Welcome. I’m Dave Watson, and I’ve spent over thirty years in the HVAC trade, sizing and installing ductwork in everything from small bungalows to larger commercial spaces. I’ve seen the good, the bad, and the ugly when it comes to air distribution systems. What I’ve learned is that the ductwork is just as critical as the furnace or air conditioner itself. Without properly sized ducts, even the most expensive, energy-efficient equipment won’t perform as it should.
I remember a job in Tampa, Florida, where a homeowner had just put in a brand-new, high-efficiency system. They were still complaining about hot spots and high electric bills. When I checked the ducts, it was clear someone had just eyeballed the sizes. Returns were too small, some supply runs were pinched, and the airflow was a mess. We re-engineered and replaced sections of the ductwork, and the difference was night and day. The house cooled evenly, and their energy bills dropped. That homeowner learned, firsthand, that a ductwork sizing chart isn’t just a suggestion; it’s a necessity.
Key Highlights
- **Ductwork is Critical:** Proper sizing is as important as the HVAC unit itself for system performance.
- **Efficiency and Comfort:** Correctly sized ducts ensure even temperatures and lower energy bills.
- **CFM is Key:** Airflow in Cubic Feet per Minute (CFM) is the primary factor for sizing.
- **Static Pressure Matters:** Ignoring this can lead to equipment strain and noise.
- **Professional Help is Valuable:** Complex duct design often requires expert calculations and tools.
- **Avoid Common Mistakes:** Undersizing, oversizing, and poor layout severely impact system function.
Why Proper Ductwork Sizing Matters for Your HVAC System
When you talk about an HVAC system, most folks immediately think about the furnace or the air conditioner unit itself. And sure, those are the heart of the system. But the ductwork? That’s the circulatory system, carrying the conditioned air throughout your home. If that circulatory system isn’t sized right, the heart can’t do its job, no matter how strong it is.
Optimal Airflow and Distribution
The primary goal of ductwork is to deliver the right amount of conditioned air to each room. If your ducts are too small, the system has to work harder to push air through. This creates high static pressure, which is essentially resistance to airflow. Think of trying to breathe through a really narrow straw – it takes more effort. When your system experiences high static pressure, it reduces airflow, meaning some rooms won’t get enough air. You’ll end up with hot spots in summer and cold spots in winter. This is a common complaint I hear, and more often than not, it points back to undersized ductwork.
Energy Efficiency
An HVAC system that has to fight against improper ductwork is an inefficient system. When the fan motor is constantly straining to move air, it uses more electricity. This means higher utility bills for you. Conversely, oversized ducts can also be an issue. They might lead to sluggish airflow, resulting in poor air mixing and reduced velocity needed for proper air distribution, though this is less common than undersizing. The goal is always the “just right” size, which leads to your system running optimally, achieving temperature set points quicker, and consuming less energy. This directly impacts how furnace energy efficient your entire system is.
Equipment Longevity and Reliability
When an HVAC unit operates under stress due to poor ductwork, its components wear out faster. The blower motor works harder, leading to premature failure. Compressors in air conditioners can overheat. Heat exchangers in furnaces can experience issues. All of these reduce the lifespan of your expensive equipment. Proper duct sizing ensures the system operates within its design parameters, reducing strain and extending the life of your furnace and air conditioner.
Indoor Air Quality and Comfort
Beyond temperature, proper airflow also contributes to better indoor air quality. Adequate air circulation helps remove stale air and distribute filtered air. If airflow is poor, humidity levels can become an issue, leading to mugginess and even potential mold growth in some cases. Correctly sized and balanced ductwork ensures that the air in your home feels fresh and comfortable, not just temperature-controlled.
Noise Reduction
Under-sized ducts force air to move at higher velocities. This high-velocity air can create noticeable whistling or roaring noises, especially at registers and turns in the ductwork. No one wants their HVAC system sounding like a jet engine taking off. Proper sizing keeps air velocity within acceptable ranges, resulting in a much quieter operation. It’s all part of a well-designed heating cooling system.
Understanding the Basics: What Affects Duct Sizing?
Sizing ductwork isn’t just guessing. It involves understanding a few key principles and measurements. You’re trying to move a specific volume of air, at a specific rate, with minimal resistance. Let’s break down the factors.
Cubic Feet per Minute (CFM)
This is the most critical factor. CFM measures the volume of air your HVAC system needs to move per minute to properly condition your space. It’s derived from a load calculation, often referred to as a Manual J calculation. This calculation takes into account factors like your home’s square footage, insulation levels, window types and sizes, ceiling height, and even the number of occupants. Your HVAC equipment will specify a CFM output, and your ductwork must be able to handle that volume of air.
Static Pressure
Static pressure is the resistance to airflow in your duct system. It’s measured in inches of water column (IWC). Every component in your duct system contributes to static pressure: the furnace coil, the filter, the ducts themselves, elbows, transitions, and registers. HVAC manufacturers specify a maximum total external static pressure (TESP) that their equipment can handle. If your duct system creates too much static pressure, the fan motor has to work harder, leading to reduced airflow and efficiency problems.
Friction Loss
Friction loss is a component of static pressure. It’s the resistance created as air rubs against the inside surfaces of the ductwork and when it changes direction (e.g., at elbows or transitions). Longer duct runs and more turns increase friction loss. The material of the duct also plays a role – smoother surfaces like sheet metal have less friction loss than rougher surfaces like fiberglass duct board or flexible duct.
Air Velocity
Air velocity is how fast the air moves through the ducts, typically measured in feet per minute (FPM). While you need sufficient velocity to distribute air effectively, too high a velocity causes noise and increases friction loss. Too low a velocity can lead to stagnant air in certain areas. Different parts of the duct system have recommended velocity ranges:
- **Main Trunks:** 700-900 FPM (residential)
- **Branch Ducts:** 500-700 FPM (residential)
- **Return Ducts:** 500-700 FPM (residential)
Aspect Ratio
This refers to the ratio of the width to the height of a rectangular duct. A duct that is nearly square (e.g., 12×12 inches) has a better aspect ratio than a very flat, wide duct (e.g., 24×6 inches) for the same cross-sectional area. Ducts with high aspect ratios (very flat) create more friction loss and noise because they have a larger perimeter for air to rub against relative to their cross-sectional area. Aim for aspect ratios as close to 1:1 as possible when space allows.
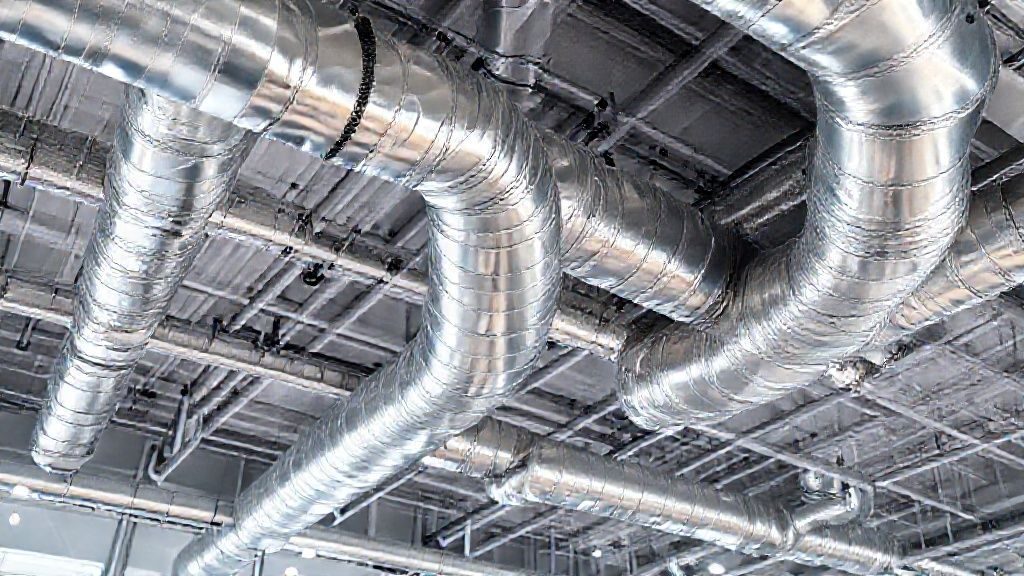
Duct Materials and Shapes
Ductwork comes in various materials and shapes, each with its own characteristics:
- **Sheet Metal (Galvanized Steel):** Very durable, smooth interior, low friction loss. Can be round or rectangular.
- **Duct Board (Fiberglass):** Insulated, good sound attenuation, but rougher interior and susceptible to damage.
- **Flexible Duct:** Easy to install, but high friction loss due to its corrugated interior and tendency to be kinked or crushed. Use minimum lengths possible.
- **Round vs. Rectangular:** Round ducts are generally more efficient for air movement (less surface area for a given volume, so less friction loss) and easier to seal than rectangular ducts. However, rectangular ducts are often used in spaces with limited height.
How to Use a Ductwork Sizing Chart Effectively
A ductwork sizing chart, or ductulator, is essentially a cheat sheet based on complex engineering formulas. It helps you determine the correct duct dimensions for a given airflow (CFM), acceptable friction loss, and air velocity. Here’s how I typically approach them:
Understanding the Chart’s Inputs
Most charts are based on the equal friction method, which aims to maintain a constant friction loss per foot of ductwork throughout the system.
- **CFM:** This is your starting point. You need to know how much air each section of duct needs to carry. For a main trunk, it will be the total system CFM. For individual branch runs, it will be the CFM required for that specific room.
- **Friction Rate:** This is expressed as inches of water column per 100 feet of duct (IWC/100ft). A common design friction rate for residential systems is 0.08 to 0.10 IWC/100ft. This value ensures that you can design a system that keeps total static pressure within the blower’s limits.
- **Air Velocity:** The chart will also show the resulting air velocity. You’ll want to ensure this falls within the acceptable ranges I mentioned earlier to avoid noise and excessive friction.
Steps for Using a Chart or Ductulator
- **Determine Required CFM:** This comes from your Manual J and Manual S calculations. You’ll have a total CFM for the system, and then specific CFMs for each supply and return branch.
- **Select a Friction Rate:** Start with a standard residential friction rate, typically 0.08-0.10 IWC/100ft.
- **Locate CFM on the Chart:** Find the required CFM for the specific duct section you are sizing.
- **Find Intersection with Friction Rate:** Move across the chart (or rotate the ductulator dial) to intersect with your chosen friction rate.
- **Read Off Duct Dimensions:** At this intersection, the chart will give you appropriate round duct diameters and sometimes equivalent rectangular duct sizes (e.g., 12-inch round or 10×10-inch rectangular).
- **Check Velocity:** Verify that the indicated air velocity is within acceptable limits for that section of the ductwork. Adjust the friction rate slightly if the velocity is too high or too low, then re-read the dimensions.
- **Consider Space Constraints:** If a round duct size is ideal but doesn’t fit, use the chart to find an equivalent rectangular duct. Remember to keep the aspect ratio as close to 1:1 as possible.
Example Scenario:
Let’s say a specific room needs 150 CFM.
If you use a friction rate of 0.08 IWC/100ft:
- A ductulator might show you need an 8-inch round duct.
- The velocity might be around 650 FPM, which is acceptable for a branch duct.
- An equivalent rectangular duct might be 6×10 inches or 7×9 inches.
If you used the same CFM but tried to force it through a 6-inch round duct, the chart would show a much higher friction rate and significantly increased velocity, indicating potential noise and static pressure issues. This is how you confirm if a given duct size is appropriate.
Step-by-Step: Calculating Your Ductwork Needs
Before you even touch a ductwork sizing chart, you need to do some groundwork. This isn’t just about picking sizes; it’s about designing a system that works cohesively. This process is often guided by ACCA Manuals J, S, and D.
Step 1: Perform a Room-by-Room Heat Load Calculation (Manual J)
This is foundational. You can’t size ducts or even an HVAC unit without knowing how much heating and cooling your home actually needs. Manual J considers:
- **Location:** Climate zone data.
- **Orientation:** Which way your house faces.
- **Construction:** Wall, floor, ceiling, and roof materials and insulation R-values.
- **Windows and Doors:** Type (single, double pane), U-factor, solar heat gain coefficient (SHGC), and dimensions.
- **Infiltration and Ventilation:** How much outside air leaks in or is intentionally brought in.
- **Internal Gains:** Heat from occupants, appliances, and lighting.
This calculation will give you the BTUs per hour (British Thermal Units) required for heating and cooling, both for the entire house and for each individual room. These room-by-room BTU figures are then converted into CFM requirements for each room.
Step 2: Select and Size HVAC Equipment (Manual S)
Once you have your Manual J load calculation, you use Manual S to select the appropriate furnace, air conditioner, or heat pump. This isn’t just about matching BTUs. Manual S helps you consider:
- **Equipment Performance Data:** Manufacturers publish data showing how their units perform under various conditions.
- **Sensible and Latent Heat:** Ensuring the equipment can handle both temperature change (sensible) and humidity removal (latent).
- **Blower Performance:** Crucially, Manual S helps determine the CFM output of the chosen unit’s blower at various static pressures.
The output of Manual S is a verified equipment selection and the total system CFM that the chosen unit can provide to meet your home’s needs.
Step 3: Design the Duct System Layout (Manual D)
Now, with your total system CFM and individual room CFM requirements, you design the ductwork. Manual D is the guide for this. This step involves:
- **Mapping Out the System:** Deciding on the layout of main supply and return trunks, and how branch ducts will connect to each room. The goal is to create the shortest, most direct runs possible with minimal turns.
- **Identifying Supply and Return Grilles:** Locating these for optimal air distribution and return.
- **Zoning (if applicable):** If you’re designing a zoned system, each zone will have its own CFM requirements and duct routing.
- **Balancing:** Aiming for roughly equal friction loss in all runs to ensure balanced airflow without excessive damper adjustments.
This is where you’d sketch out your system, noting the length of each section and the number of elbows or transitions.
Step 4: Size Individual Duct Runs Using a Ductwork Sizing Chart
With the layout in hand, you can now systematically size each section.
- **Start with the Longest, Most Critical Run:** Begin by sizing the longest supply duct run from the main plenum to the furthest room. This helps establish a baseline friction rate for the system.
- **Determine CFM for Each Section:** Work your way back from the registers. If a room needs 100 CFM, that branch duct needs to deliver 100 CFM. If a main trunk serves three rooms requiring 100 CFM each, that section of the trunk needs to carry 300 CFM.
- **Apply the Duct Sizing Chart:** For each section of the main trunk and each individual branch duct, use your chosen friction rate (e.g., 0.08 IWC/100ft) and the calculated CFM for that section to determine the appropriate duct size (diameter for round, or width/height for rectangular).
- **Size Return Ducts:** Follow the same process for the return air side. Total return CFM should equal total supply CFM. Individual return branches or grille sizes are based on the CFM expected to return from that area.
- **Account for Fittings:** Remember that elbows, transitions, and take-offs add resistance. While the sizing chart gives you straight duct dimensions, a professional design accounts for the equivalent length of these fittings, which contributes to overall static pressure.
This systematic approach ensures that every part of your duct system is designed to handle the required airflow efficiently and quietly. It’s a complex process, which is why professionals rely on specialized software and experience to do it right. If you’re looking for the best hvac solutions, proper duct design is non-negotiable.
Common Mistakes to Avoid in Duct Sizing and Installation
I’ve seen plenty of shortcuts and errors over the years. They always lead to problems down the line. Avoiding these common mistakes will save you headaches and money.
1. Guessing or Eyeballing Duct Sizes
This is probably the most frequent and costly mistake. Just because a previous system had a 10-inch main trunk doesn’t mean a new, different capacity system can use the same. Every home and every HVAC unit has unique requirements. Rely on calculations (Manual J, S, D) and duct sizing charts, not on intuition or what “looks right.”
2. Undersizing or Oversizing Ducts
- **Undersizing:** Leads to high static pressure, reduced airflow, noisy operation, uneven temperatures, increased energy consumption, and premature equipment failure. The system strains, but doesn’t deliver enough air.
- **Oversizing:** While less common and generally preferred over undersizing, significantly oversized ducts can lead to low air velocity, poor air mixing, and inefficient distribution. They also cost more in materials and take up more space.
3. Ignoring Static Pressure
Many DIYers and even some less experienced pros focus only on CFM and duct size, forgetting that static pressure is the real indicator of how hard the blower motor has to work. You need to verify that your total external static pressure (TESP) is within the manufacturer’s specified range. This includes the static pressure drop across the coil and filter, not just the ducts.
4. Poor Duct Layout and Routing
- **Excessive Turns and Long Runs:** Every bend, especially sharp 90-degree elbows, adds friction loss. Long runs also add resistance. Plan the shortest, most direct routes possible.
- **Kinks in Flexible Duct:** Flexible duct, while convenient, is prone to kinking or sagging, which drastically reduces its effective cross-sectional area and increases friction. Always keep it taut and use minimal lengths.
- **Incorrect Take-offs:** Improperly designed take-offs from the main trunk can disrupt airflow and create turbulence.
5. Neglecting Return Air Duct Sizing
Many homeowners (and some installers) focus heavily on the supply side but neglect the return air system. The return side is just as important. If the return ducts are too small, the system can’t efficiently pull stale air back to be conditioned. This creates negative pressure in the house, reduces supply airflow, and starves the blower. Total return CFM should equal total supply CFM.
6. Inadequate Sealing and Insulation
Even perfectly sized ducts are useless if they leak or aren’t insulated.
- **Leaks:** Duct leaks can waste 20-30% or more of your conditioned air, pushing it into unconditioned spaces like attics or crawl spaces. Use mastic sealant and fiberglass mesh tape (not duct tape!) to seal all seams and connections.
- **Insulation:** Ducts running through unconditioned spaces must be properly insulated to prevent heat gain in summer and heat loss in winter. This is critical for efficiency and preventing condensation.
7. Not Accounting for Future Changes
If you’re planning a home addition, a finished basement, or a significant change in window types, those changes will impact your home’s heat load and, therefore, your ductwork needs. Factor these into your calculations from the start if possible, or be prepared to modify your ductwork later.
These mistakes might seem minor individually, but they compound quickly, turning an otherwise good HVAC system into a frustrating, inefficient one.
The Impact of Duct Design on Airflow, Comfort, and Efficiency
Think of your ductwork as a finely tuned instrument. Every part of its design impacts the final performance. It’s not just about pushing air; it’s about delivering it precisely where and how it’s needed.
Precise Airflow Distribution
Good duct design ensures that each room receives the exact CFM it needs, as determined by the Manual J calculation. This prevents the common problem of “hot spots” in summer or “cold spots” in winter where the air doesn’t reach effectively. With balanced airflow, every register delivers its designed volume of air, leading to uniform temperatures throughout your home. This is often achieved through careful sizing of branch ducts and the strategic placement of adjustable dampers for fine-tuning.
Enhanced Thermal Comfort
When airflow is distributed correctly, it eliminates drafts and ensures that conditioned air mixes effectively within each space. You won’t feel sudden blasts of cold or hot air. Instead, the temperature will be consistent and comfortable, without the need to constantly adjust the thermostat. This steady, even temperature is the hallmark of a well-designed system, contributing significantly to occupant satisfaction. It’s also important for specialized applications, even something like a horse trailer ac needs good airflow.
Maximized Energy Efficiency
A properly designed duct system minimizes static pressure, allowing the HVAC unit’s blower to operate at its most efficient speed. This means less electricity consumed by the fan motor. Furthermore, when conditioned air reaches its destination without excessive loss through leaks or poor insulation, less energy is wasted. The system doesn’t have to run as long or as hard to maintain the desired temperature, directly translating to lower utility bills. Sealing and insulating ducts are just as critical to energy efficiency as the proper sizing itself.
Reduced Noise Levels
One of the immediate benefits of correct duct sizing and design is a quieter system. When air travels at appropriate velocities through adequately sized ducts, the turbulent airflow that causes whistling, roaring, or vibration is greatly reduced. Elbows and transitions are designed to minimize turbulence, and round ducts are often preferred for their acoustic benefits over rectangular ducts, when space permits. A quiet system is often an efficient system, as noise typically indicates resistance or turbulence.
Improved Indoor Air Quality (IAQ)
Effective air circulation, driven by good duct design, is vital for maintaining healthy indoor air quality. It helps to:
- **Remove Contaminants:** Stale air, odors, and airborne particles are efficiently drawn back into the return system, passed through filters, and replaced with fresh, conditioned air.
- **Control Humidity:** Proper airflow helps prevent pockets of stagnant, humid air that can lead to mold and mildew growth, especially in poorly ventilated areas.
- **Distribute Filtered Air:** Ensures that the air purified by your HVAC filter reaches all parts of your home evenly.
Longevity of Equipment
When a system operates without excessive static pressure or strain, its components last longer. The blower motor, compressor, and other moving parts are not overworked. This reduces the frequency of repairs and postpones the need for costly equipment replacement. A well-designed duct system is an investment in the long-term reliability of your entire HVAC setup.
Flexibility for System Upgrades
A thoughtfully designed duct system, especially one with slightly larger main trunks, can offer more flexibility if you decide to upgrade your HVAC equipment in the future to a higher capacity unit. While significant capacity changes will always require a review, a robust original design can make future modifications simpler and less costly.
In essence, good duct design elevates an HVAC system from merely functional to truly high-performing, delivering consistent comfort, cleaner air, and measurable energy savings. It’s a testament to the fact that the “behind the scenes” elements are often just as important as what’s visible.
When to Call a Professional for Ductwork Installation and Repair
I get it. People like to tackle projects themselves. There’s a certain satisfaction in doing your own work. But when it comes to ductwork, especially sizing and complex installations, knowing when to call in a professional is crucial. This isn’t just about saving a few bucks upfront; it’s about avoiding years of discomfort, high energy bills, and potential equipment damage.
Complex Calculations and Design
As I’ve outlined, proper duct sizing involves detailed load calculations (Manual J), equipment selection (Manual S), and systematic duct design (Manual D). These aren’t simple formulas you can punch into a basic calculator. They require specialized software, an understanding of building science, and practical experience. A professional HVAC technician or engineer has the tools and training to perform these calculations accurately. If you’re designing a new system from scratch, or significantly modifying an existing one, you need a pro.
Diagnosing Airflow Problems
If you’re experiencing uneven temperatures, excessive noise from your ducts, or unusually high energy bills, the problem often lies in the ductwork. Diagnosing these issues accurately requires specialized instruments like anemometers (to measure airflow velocity), static pressure gauges, and thermal cameras. A professional can identify specific bottlenecks, leaks, or sizing errors that are impacting your system’s performance. They can also tell you if the issue is with the ducts or something else entirely.
Major Ductwork Modifications or Replacement
Are you adding a new room, finishing a basement, or installing a completely new HVAC system? These scenarios typically require significant modifications or a complete overhaul of your ductwork. It’s not just about running new lines; it’s about integrating them seamlessly into the existing system (if any) and ensuring the entire network is balanced. This is a job for someone who understands airflow dynamics and can implement the design correctly.
Ensuring Proper Sealing and Insulation
While sealing visible duct leaks might seem straightforward, ensuring all seams are airtight, especially in hard-to-reach areas like attics or crawl spaces, is a different story. Professionals use appropriate materials (like mastic) and techniques to ensure a long-lasting, airtight seal. They also know the correct R-value of insulation required for different duct locations to prevent energy loss and condensation.
Balancing and Commissioning the System
After installation or repair, a crucial step is balancing the system. This involves using dampers to fine-tune the airflow to each room, ensuring that every register delivers the correct CFM. This process is called “commissioning” and ensures the system performs as designed. It requires specialized tools and expertise to do accurately, leading to optimal comfort and efficiency.
Permitting and Code Compliance
In many areas, major HVAC work, including duct modifications, requires permits and must comply with local building codes. Professionals are familiar with these requirements and can ensure your installation meets all safety and performance standards. This protects you legally and ensures your homeowner’s insurance remains valid.
My advice is this: if you’re doing something simple like replacing a single run of flex duct with the same size, and you’re confident it’s the right size, go ahead. But for anything involving calculations, system design, or significant changes, invest in professional expertise. It will pay for itself in comfort, efficiency, and peace of mind. Feel free to contact us for a quote if you’re unsure.
Frequently Asked Questions About Duct Sizing
Q: What happens if my ducts are too small?
A: If your ducts are too small, your HVAC system will have to work harder to push air through them. This leads to increased static pressure, which can cause several problems: reduced airflow to rooms (leading to uneven temperatures), increased noise (whistling or roaring), higher energy bills as the blower motor strains, and premature wear and tear on your HVAC equipment, particularly the blower motor and compressor.
Q: What is CFM and why is it important for duct sizing?
A: CFM stands for Cubic Feet per Minute, and it measures the volume of air your HVAC system needs to move to heat or cool your space effectively. It’s the most critical factor for duct sizing because ducts must be large enough to handle the required CFM without creating excessive resistance or static pressure. Your home’s heat load (BTUs) determines the total CFM needed, which is then divided among individual rooms and duct runs.
Q: Can I use a ductwork sizing chart if I don’t know my home’s CFM?
A: You can use a chart, but without knowing your specific CFM requirements (derived from a Manual J load calculation and Manual S equipment selection), you’ll be guessing. Guessing CFM often leads to undersized or oversized ducts, which defeats the purpose of using the chart for accurate sizing. It’s best to have a professional determine your CFM needs first.
Q: Is round duct or rectangular duct better?
A: Generally, round ducts are more efficient for air movement. They have less internal surface area for a given cross-sectional area compared to rectangular ducts, which means less friction loss. They are also easier to seal. However, rectangular ducts are often necessary where space is limited, such as in tight ceiling plenums or wall cavities. When using rectangular ducts, aim for an aspect ratio as close to 1:1 (square) as possible to minimize friction and noise.
Q: How often should I inspect my ductwork?
A: I recommend a visual inspection of accessible ductwork annually, usually during your routine HVAC maintenance. Look for obvious signs of damage, leaks, or disconnected sections. A more thorough professional inspection for leaks or blockages might be warranted every 5-10 years, or if you notice consistent performance issues or unusually high energy bills. You can also check out resources from wholesale hvac suppliers.
Q: Do return air ducts need to be sized the same way as supply ducts?
A: Yes, absolutely. The return air system is just as crucial as the supply side. The total CFM for your return ducts should generally match the total CFM for your supply ducts. If the return air pathways are restricted or undersized, the blower can’t pull enough air back to the unit, reducing the overall system airflow and creating negative pressure within your home.
Q: What is static pressure and how does it relate to duct sizing?
A: Static pressure is the resistance to airflow within your duct system, measured in inches of water column (IWC). Every component—ducts, elbows, filters, coils, registers—creates some resistance. Proper duct sizing aims to keep this resistance within the manufacturer’s specified limits for your HVAC unit. Too much static pressure means your blower works harder, leading to less airflow, more noise, higher energy consumption, and potential equipment damage.
Final Thoughts
I’ve been in this business a long time, and I’ve learned that you can have the most advanced furnace or air conditioner on the market, but if the ductwork isn’t right, the whole system will underperform. It’s a fundamental truth in HVAC. Proper ductwork sizing isn’t an option; it’s a requirement for a comfortable, efficient, and long-lasting system.
Taking the time to understand the principles of airflow, CFM, static pressure, and how to correctly use a ductwork sizing chart pays off. It means your home will have even temperatures, your energy bills will be lower, and your HVAC equipment will last longer. While some basic repairs might be within the reach of a determined homeowner, when it comes to designing or significantly altering your duct system, a professional’s expertise is invaluable. They have the tools, the knowledge, and the experience to get it right the first time. Don’t compromise on your comfort or your investment.