When it comes to your home’s comfort and energy efficiency, many homeowners focus on the big pieces of equipment: the furnace, the air conditioner, or the heat pump. And that’s fair enough – they’re the heart of your HVAC system. But what often gets overlooked, and what’s just as critical, is the system’s circulatory system: the ductwork. Over my decades in the HVAC field, I’ve seen countless homes where perfectly good equipment performs poorly simply because the ducts weren’t sized correctly. It’s like having a top-of-the-line engine in a car with tiny, restrictive fuel lines. It just won’t run right.
I remember one job in Tampa, Florida, where a family had just invested in a brand-new, high-efficiency AC unit. They were expecting significant relief from the Florida heat and lower utility bills. But after a few weeks, they were calling us back, complaining that certain rooms were still sweltering, and the unit seemed to run constantly. We went in, did our diagnostics, and sure enough, the existing ductwork, which had been there since the house was built in the 1970s, was completely undersized for the new unit’s capacity and the home’s updated insulation. It was restricting airflow, causing the unit to struggle, short-cycle, and waste energy. Proper duct sizing is not just a nice-to-have; it’s fundamental to your system’s performance and your comfort.
Key Highlights
- Duct Sizing is Crucial: Incorrect duct sizing leads to poor comfort, higher energy bills, and reduced equipment lifespan.
- CFM is Key: Cubic Feet per Minute (CFM) dictates the amount of air required, which is the primary factor in determining duct size.
- Static Pressure Matters: This resistance to airflow affects how hard your blower motor has to work.
- Charts Are Tools: Duct size charts, friction rate charts, and equivalent length calculations are essential for accurate design.
- Common Mistakes: Both oversized and undersized ducts create significant problems.
- Professional Help: For major ductwork modifications or new installations, always consult a qualified HVAC professional.
Understanding the Importance of HVAC Duct Sizing
Think of your HVAC system as a circulatory system, much like the human body. Your furnace or air conditioner is the heart, pumping conditioned air (the blood) throughout your home. The ductwork is the network of arteries and veins, distributing that air to every room. If those arteries are too narrow, too wide, or blocked, the heart has to work harder, and the body doesn’t get what it needs. In HVAC terms, this means your system struggles to deliver heated or cooled air effectively, leading to a host of problems.
When ducts are correctly sized, several good things happen. First, you get consistent temperatures throughout your home. No more hot spots in one room and cold spots in another. Second, your system operates more efficiently. The blower motor doesn’t have to strain, meaning it uses less electricity and experiences less wear and tear. This translates directly to lower utility bills and a longer lifespan for your expensive equipment. Third, proper airflow helps maintain indoor air quality by effectively circulating and filtering air. Finally, a properly sized duct system contributes to a quieter operation, as air isn’t being forced through tight restrictions or whistling through oversized gaps.
Conversely, incorrect duct sizing is a silent killer of comfort and efficiency. It’s one of the most common issues I find during home inspections, often masked by symptoms like high energy bills or rooms that never quite reach the set temperature. Many times, homeowners assume their furnace or AC unit is failing when, in fact, the ductwork is the real culprit. Understanding the basics of duct sizing can empower you to ask the right questions and ensure your system is performing at its best.
How to Read and Use a Duct Size Chart Effectively
A duct size chart is a critical tool for anyone involved in HVAC design or installation. It’s essentially a lookup table that helps determine the appropriate duct dimensions (diameter for round ducts, width and height for rectangular ducts) based on the amount of airflow needed and the acceptable friction loss. It sounds a bit technical, but let me break it down.
Understanding CFM (Cubic Feet per Minute)
The first thing you need to know is the CFM, or Cubic Feet per Minute, for each section of your ductwork. CFM represents the volume of air moving through the duct. Your entire HVAC system has a total CFM output, determined by the size and type of your furnace or air handler. This total CFM is then divided among the various branches of your duct system, with each room or zone requiring a specific CFM to achieve proper heating or cooling. Generally, a good rule of thumb for residential applications is about 400 CFM per ton of air conditioning, but this can vary based on design. You’ll also need to calculate the CFM required for each individual room based on its square footage, ceiling height, and heat load calculations (which typically come from a Manual J load calculation).
Friction Loss and Static Pressure
The next key concept is friction loss, often measured in “inches of water column” per 100 feet of duct. As air moves through ducts, it experiences resistance from the duct walls and especially from fittings like elbows, transitions, and take-offs. This resistance is called friction loss, and it contributes to what we call “static pressure” in the system. Your blower motor is designed to overcome a certain amount of static pressure. If the friction loss is too high (due to undersized ducts or too many restrictive fittings), the static pressure becomes excessive, and the blower struggles to move enough air. Duct size charts typically use a maximum friction rate, often around 0.08 to 0.10 inches of water column per 100 feet, as a design parameter for residential systems.
Using the Chart
Most duct size charts are laid out with CFM on one axis and friction rate on another. You’ll typically find columns or rows for different duct sizes (e.g., 6-inch round, 8×12 rectangular). To use it, you’d find your calculated CFM requirement for a specific duct run. Then, you’d look across or down to find the duct size that corresponds to that CFM at an acceptable friction rate. For example, if you need 200 CFM for a bedroom supply run, and you’re designing for a 0.08 friction rate, you’d find the intersection on the chart to determine the appropriate round or rectangular duct size. Many charts also include air velocity, which is important for preventing noisy airflow (too high a velocity) or stratification (too low a velocity).
It’s important to remember that these charts are for straight runs of duct. Fittings like elbows and reducers add “equivalent length” to a duct run, which increases the total friction loss. This needs to be factored into your calculations, often by converting each fitting into an equivalent length of straight duct that would produce the same friction. This is where the calculation can get a bit more complex, and why HVAC designers use specialized software or detailed tables beyond simple charts.
Key Factors Influencing Ductwork Dimensions (CFM, Static Pressure)
Ductwork dimensions aren’t pulled out of a hat. They’re the result of careful calculations that take into account several critical factors. Get these wrong, and your system won’t perform as it should.
Calculating CFM Requirements
The most fundamental factor is the CFM, or Cubic Feet per Minute, of air that needs to be delivered to each space. This isn’t just a guess; it’s derived from a detailed process called a “load calculation,” most commonly following ACCA (Air Conditioning Contractors of America) Manual J standards. A Manual J calculation considers everything from the climate zone, your home’s insulation levels, window types and sizes, orientation to the sun, ceiling height, number of occupants, and even the heat generated by appliances and lighting. Once the total heating and cooling loads for each room are determined, these loads are converted into required CFM values. For cooling, a common guideline is 400 CFM per ton of cooling, but this can be adjusted based on specific dehumidification needs or sensible heat ratios. For heating, it might be slightly different. The important thing is that each supply and return register has a specific CFM target, and the duct serving it must be sized to deliver that target.
The Role of Static Pressure
Static pressure is the resistance to airflow within your duct system. It’s an invisible force, but a very real one that your blower motor has to overcome to move air. Every component in the airflow path contributes to static pressure: the return grille, the filter, the evaporator coil, the heat exchanger, the supply plenum, the ductwork itself (friction), and all the various fittings (elbows, transitions, dampers). The sum of all these resistances is the total external static pressure (TESP). Your furnace or air handler’s blower motor has a “static pressure rating” – it’s designed to operate efficiently within a specific range of static pressure. If your duct system creates too much static pressure (due to being undersized or having too many restrictive bends), the blower has to work harder, consuming more electricity, moving less air than intended, and potentially overheating the motor. This is why when designing ductwork, we aim for a balanced system where the total static pressure falls within the blower’s operating range, allowing it to deliver the intended CFM at peak efficiency.
Equivalent Length and Fittings
As mentioned earlier, straight duct runs have a certain amount of friction loss. But fittings – elbows, tees, reducers, take-offs, boots – create significantly more resistance. To simplify calculations, each fitting is assigned an “equivalent length” of straight duct that would create the same amount of friction. For example, a sharp 90-degree elbow might be equivalent to 20 feet of straight duct. By adding up the actual length of your duct runs and the equivalent lengths of all your fittings, you get a “total effective length” for each duct path. This total effective length is then used with friction loss charts to determine the ideal duct size that maintains an acceptable friction rate and static pressure for the required CFM.
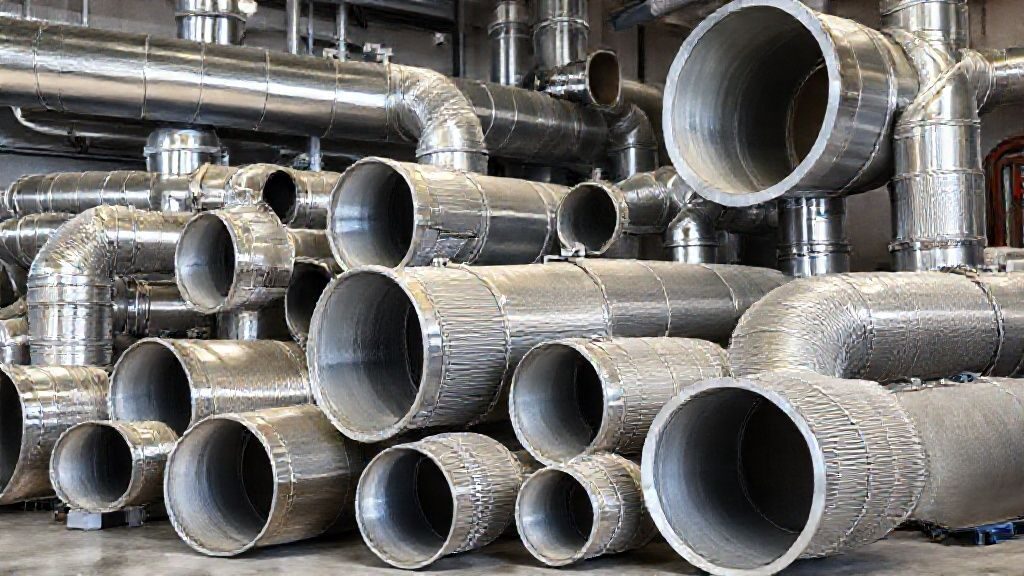
Common Ductwork Materials and Their Sizing Considerations
The material your ductwork is made from can also influence sizing decisions, primarily due to differences in friction loss characteristics, insulation properties, and installation methods.
Galvanized Steel
Description: This is the classic, rigid metal ductwork, often seen in commercial buildings and older homes. It’s durable, fire-resistant, and offers low friction loss when properly installed. It comes in both round and rectangular shapes.
Sizing Considerations: Galvanized steel typically offers the lowest friction rate among common materials, meaning for the same CFM, you might get away with slightly smaller dimensions compared to, say, flexible duct. However, its rigidity means more labor for custom fittings and insulation. Rectangular ducts, while easy to fit into tight spaces, can have slightly higher friction loss than round ducts of equivalent cross-sectional area due to more surface area and sharper turns at corners.
Aluminum
Description: Similar to galvanized steel in rigidity, but lighter and easier to work with. Often used for dryer vents and smaller residential applications. Aluminum ducts can be found in rigid forms or as semi-rigid, corrugated flexible ducts.
Sizing Considerations: Rigid aluminum has similar low friction properties to steel. The semi-rigid, corrugated aluminum can have higher friction due to its ribbed interior, which increases surface area and resistance. When using these, it’s crucial to account for the increased friction in your sizing calculations, potentially requiring a slightly larger diameter than a smooth-walled duct for the same CFM.
Fiberglass Duct Board (Ductboard)
Description: Made from compressed fiberglass panels, often with an aluminum foil facing on the exterior. These ducts are fabricated on-site by cutting, scoring, and folding the boards, then sealing the seams. They offer inherent insulation properties.
Sizing Considerations: The interior surface of fiberglass duct board is rougher than smooth metal, leading to slightly higher friction loss. This means for a given CFM, you might need to size fiberglass ducts slightly larger than steel ducts to maintain the same friction rate. The insulation is a big plus, reducing heat loss or gain as air travels through the ducts, which improves system efficiency, especially in unconditioned spaces like attics or crawl spaces.
Flexible Duct (Flex Duct)
Description: This consists of a wire coil wrapped in a flexible plastic or metalized plastic sleeve, often with fiberglass insulation around it, and then another outer vapor barrier jacket. It’s popular for its ease of installation, especially for connecting rigid duct runs to terminal units or for short runs to registers.
Sizing Considerations: Flexible duct has the highest friction loss of all common materials, especially if it’s kinked, bent sharply, or not fully stretched out. Each bend significantly increases static pressure. For this reason, it’s generally recommended to size flexible duct at least one size larger than what would be used for rigid metal, especially for longer runs. Its use should be minimized to short, straight runs whenever possible, or strictly adhere to Manual D guidelines for proper sizing and installation to avoid significant airflow issues. Incorrectly installed flex duct is a very common cause of airflow problems I see in homes.
The Dangers of Incorrect Duct Sizing (Too Big or Too Small)
It’s a common misconception that “bigger is always better” when it comes to ducts, or conversely, that making them smaller will save space without consequences. Both extremes lead to significant problems that undermine your HVAC system’s performance and cost you money.
Consequences of Oversizing Ducts (Too Big)
If your ducts are too large for the amount of air your system needs to move, several issues arise:
- Reduced Air Velocity: Air moves too slowly through oversized ducts. In cooling mode, this can lead to poor mixing of air, resulting in stratification (cold air pooling at the floor, warm air at the ceiling) and uneven temperatures. In heating mode, warm air might not reach its destination effectively.
- Poor Dehumidification: For air conditioning, if the air velocity over the coil is too low, the coil won’t remove enough moisture from the air. This leaves your home feeling clammy and uncomfortable, even if the temperature is technically cool.
- Increased Dust and Allergen Accumulation: Slower air velocity means dust, pollen, and other airborne particles are more likely to settle out of the airstream and accumulate inside the ducts, rather than being carried back to the filter.
- Increased Noise: While counterintuitive, oversized ducts can sometimes lead to noise issues if the air velocity at the registers is too low, causing “dumping” where air falls rather than being projected. Additionally, the sheer volume of air moving through very large plenums can create resonant humming.
- Higher Installation Costs: Larger ducts require more material and take up more space, leading to higher initial installation expenses. They can also be harder to route through existing structures.
Consequences of Undersizing Ducts (Too Small)
Undersized ducts are arguably more common and cause more immediate, noticeable problems:
- Reduced Airflow (Low CFM): The most direct consequence. The ducts can’t physically deliver enough conditioned air to the rooms, no matter how hard the blower works. This leads to hot or cold spots, uncomfortable rooms, and your system struggling to reach the thermostat setting.
- Increased Static Pressure: The restricted airflow creates excessive static pressure, forcing your blower motor to work much harder. This overworks the motor, leading to premature wear and tear, and significantly increases electricity consumption.
- High Air Velocity and Noise: When air is forced through too-small ducts, its velocity dramatically increases. This results in whistling, rushing air sounds, and noisy registers, making your home uncomfortable not just thermally, but acoustically.
- Blower Motor Burnout: Continuously operating against high static pressure can cause the blower motor to overheat and eventually fail, requiring expensive repairs or replacement.
- Reduced Equipment Efficiency: Your expensive high-efficiency furnace or air conditioner can’t achieve its rated efficiency if it can’t move its designed amount of air. This means you’re paying for efficiency you’re not getting, leading to higher utility bills. This is a common issue for homeowners in California, for example. Many california hvac systems struggle with existing undersized ductwork when upgrading to modern, higher-efficiency equipment.
- Coil Icing (AC): In air conditioning systems, insufficient airflow across the evaporator coil can cause the coil to get too cold and freeze up, leading to a complete loss of cooling and potential water damage.
The goal is always to find the “just right” size – the optimal balance that delivers the required CFM at an appropriate velocity and static pressure, ensuring maximum comfort, efficiency, and equipment longevity.
Tools and Resources for Accurate Duct Sizing Calculations
Accurate duct sizing is a scientific process, not a guessing game. Professionals rely on specific methodologies, tools, and resources to get it right. Homeowners, while not expected to perform these calculations themselves, should be aware of what goes into a proper design.
ACCA Manual J, D, and S
- Manual J (Residential Load Calculation): This is the starting point for any HVAC design. As I mentioned, Manual J calculates the precise heating and cooling loads for each room in your home, considering all heat gains and losses. This gives you the required BTU/hr and, crucially, the CFM needed for each space.
- Manual S (Equipment Selection): Once the Manual J loads are known, Manual S guides the proper selection of HVAC equipment (furnace, AC, heat pump). It ensures that the chosen equipment is appropriately sized – not too big, not too small – to meet the calculated loads.
- Manual D (Duct Design): This is the blueprint for ductwork. Manual D uses the CFM requirements from Manual J, along with factors like friction rates, equivalent lengths of fittings, and static pressure constraints, to meticulously design the entire duct system. It determines the size and shape of every duct run, plenum, and takeoff, ensuring balanced airflow throughout the home. It’s a comprehensive approach that accounts for every curve and connection in your system.
Friction Loss Charts and Tables
These charts are the backbone of Manual D calculations. They graphically or numerically represent the relationship between CFM, duct size, air velocity, and friction loss per 100 feet of duct for various materials and shapes (round, rectangular). They allow designers to select duct sizes that keep friction loss within an acceptable range for the system’s static pressure budget. Equivalent length tables for common fittings are also used in conjunction with these charts to account for the additional resistance caused by bends and transitions.
Specialized Software
While manual calculations using charts and tables are possible, modern HVAC professionals almost universally use specialized software. Programs like Wrightsoft Right-Suite Universal, Elite Software CHVAC, or even manufacturer-specific sizing tools automate the complex calculations involved in Manual J, S, and D. This software can quickly analyze hundreds of variables, design duct layouts, calculate friction losses for every segment, and generate reports that ensure compliance with industry standards. These tools drastically reduce calculation errors and save significant design time, leading to more accurate and efficient systems.
Airflow Hoods and Manometers
These are tools used during installation and commissioning to verify that the designed system is actually delivering the intended airflow. An airflow hood (or balometer) is placed over a supply or return register to directly measure the CFM coming out. A manometer is used to measure static pressure at various points in the duct system. By comparing these real-world measurements to the design specifications, technicians can make adjustments (like balancing dampers) to ensure the system is truly optimized. Sometimes, even with the best design, adjustments are needed to fine-tune the system’s performance, especially if you’re getting a new ac console unit or a complete system upgrade.
When to Consult an HVAC Professional for Ductwork
While understanding the basics is great for homeowners, ductwork design and modification are specialized tasks that usually require the expertise of a qualified HVAC professional. Knowing when to call them in can save you a lot of headaches and money in the long run.
You should absolutely consult an HVAC professional in these situations:
- New HVAC System Installation: Any time you’re installing a new furnace, air conditioner, or heat pump, the ductwork needs to be assessed. Modern high-efficiency equipment moves air differently than older units. A professional will perform a Manual J, S, and D calculation to ensure your new system and existing ductwork are a perfect match, or to design necessary modifications.
- Major Renovations or Additions: Adding rooms, finishing a basement, or significantly changing the layout of your home will alter the heating and cooling load of the affected areas. This requires a revised Manual J and D calculation to extend or modify your ductwork appropriately.
- Persistent Hot or Cold Spots: If certain rooms are consistently too hot or too cold, even after trying basic troubleshooting (like adjusting registers), it’s a strong indicator of an airflow imbalance or incorrectly sized ductwork. A professional can diagnose the issue and propose solutions.
- High Energy Bills with No Obvious Cause: If your energy bills are unusually high, and your equipment is relatively new and well-maintained, inefficient ductwork could be the culprit. A professional can test static pressure and airflow to identify problems.
- Noisy Ducts or Registers: Whistling, roaring, or rattling noises coming from your ducts often signal airflow restrictions or oversized ducts. This requires a professional assessment.
- Visible Ductwork Damage or Leaks: If you see significant dents, disconnected sections, or feel air escaping from your ducts, these need immediate attention. While small leaks can sometimes be sealed by a homeowner, extensive damage or leaks in hard-to-reach areas are best handled by experts.
- Replacing Existing Ductwork: If your ductwork is old, damaged, or made from materials like asbestos-containing air ducts (common in older homes), it might be time for a full replacement. This is a complex job that requires professional design and installation.
- Considering a Zoning System: If you’re looking to divide your home into different temperature zones, this involves significant ductwork modification and the installation of dampers and controls. This is definitely a job for a professional.
A reputable HVAC contractor will always perform load calculations and proper duct sizing as part of their installation or diagnostic process. Don’t settle for a contractor who just swaps out equipment without looking at the entire system, especially the ductwork. If you need expert help, you can always contact us for a quote. For comprehensive services, finding the best hvac professionals ensures all aspects of your system are properly addressed.
FAQ
Q: Can I just eyeball my duct sizes, or is it really that complicated?
A: It’s really that complicated. Eyeballing duct sizes is a recipe for an inefficient, uncomfortable, and potentially damaging HVAC system. Proper sizing requires detailed calculations using Manual J, S, and D guidelines, considering factors like CFM, static pressure, and friction loss. A professional will use charts and specialized software to get it right.
Q: What’s the biggest mistake homeowners make regarding ductwork?
A: The biggest mistake I see is either ignoring the ductwork completely when upgrading equipment or trying to make DIY modifications without understanding the principles of airflow. Often, people replace an old AC with a new, more powerful one, but leave the old, undersized ducts in place, leading to immediate efficiency and comfort problems. Another common issue is not knowing what temperature is best to set air conditioner, which can exacerbate issues with an already poorly designed duct system.
Q: How can I tell if my ducts are undersized without special tools?
A: While a professional can give you definitive answers, some signs of undersized ducts include: consistently uncomfortable rooms (hot or cold spots), high noise levels (whistling or rushing air from registers), your HVAC system running constantly without reaching the set temperature, or noticeably higher energy bills than expected. If you experience these, it’s time to call a pro for an assessment.
Q: Can sealing duct leaks compensate for undersized ducts?
A: Sealing duct leaks is always a good idea and can significantly improve efficiency and comfort, but it cannot fix an undersized duct system. Leaks cause air loss, while undersizing causes airflow restriction. You can stop air from escaping, but if the duct itself is too small, it still won’t allow enough air to pass through at the correct velocity and pressure.
Q: Is it better to have round or rectangular ducts?
A: From an airflow perspective, round ducts are generally more efficient. They have less surface area per unit of cross-sectional area and no sharp corners, which means less friction loss and smoother airflow compared to rectangular ducts of the same cross-sectional area. However, rectangular ducts are often used because they fit better into tight spaces, like joist cavities. When rectangular ducts are used, care must be taken to ensure proper sizing and design to mitigate increased friction.
Final Thoughts
I can’t stress enough how vital proper duct sizing is to the health and efficiency of your entire HVAC system. It’s not just an accessory; it’s an integral component that dictates how well your expensive furnace or air conditioner can actually do its job. Over the years, I’ve seen countless homeowners spend good money on high-efficiency equipment, only to be disappointed because the ductwork couldn’t keep up. Don’t let that happen to you. Whether you’re upgrading your system, renovating, or just trying to solve persistent comfort issues, always ensure your ductwork is properly evaluated and sized by a qualified professional. It’s an investment that pays dividends in comfort, energy savings, and equipment longevity.