Alright, let’s talk mini splits. I’ve seen just about everything in my decades in this trade, from old mercury thermostats to the latest smart home systems. Back in the day, if you wanted to add cooling to a specific room, you were looking at a window unit – noisy, inefficient, and a security risk. I remember one summer in Atlanta, a homeowner had converted their garage into a workshop. It was boiling hot, and they were running three window units, practically tripping their breaker every other hour. Their power bill was astronomical. We put in a mini split, and not only did it cool the space properly, but their energy usage for that area dropped significantly. That’s the kind of difference a well-installed mini split can make, and it’s why a lot of folks are looking into doing it themselves these days.
The truth is, while some folks might tell you it’s a job strictly for the pros, with the right information and a bit of elbow grease, many homeowners can successfully tackle a DIY mini split installation. It’s not about being a full-blown HVAC technician overnight, but about understanding the steps, respecting the safety protocols, and knowing when to call in specialized help for certain parts. Think of it as a significant home improvement project that can save you a good chunk of change on labor costs. Plus, there’s a real sense of accomplishment when you flip the switch and feel that first blast of cool, or warm, air you installed yourself.
Key Highlights
- Significant Savings: DIY installation can cut your overall project cost by 30-50% compared to professional services.
- Increased Comfort: Enjoy zoned heating and cooling, allowing you to control temperatures in individual rooms or areas.
- Enhanced Energy Efficiency: Mini splits are generally more efficient than traditional window units or central HVAC systems due to their ductless design.
- Relatively Straightforward: Many modern mini split kits are designed with DIYers in mind, featuring pre-charged lines and quick-connect fittings.
- Essential Tools: While some specialized tools are needed, many are common household items or easily rentable.
- Safety First: Electrical and refrigerant handling require careful attention to safety guidelines to prevent injury or system damage.
Why Choose a DIY Mini Split Installation?
The primary reason most people consider a DIY mini split installation is, quite frankly, cost. Professional HVAC installation can be expensive, often doubling the price of the unit itself. By doing it yourself, you’re saving a substantial amount on labor. Beyond the financial aspect, there’s a real benefit in controlling your own project. You can work on your own schedule, take your time to ensure everything is just right, and gain a deeper understanding of your home’s mechanical systems.
Mini splits themselves offer numerous advantages over traditional HVAC systems. They provide zoned heating and cooling, meaning you can heat or cool only the rooms you’re using, which is a huge energy saver. Unlike central air systems that rely on extensive ductwork, mini splits are ductless. This eliminates the energy losses associated with leaky ducts, which can account for more than 30% of energy consumption in some homes. If you’re comparing this to a traditional ducted system, you might even consider ductwork software to ensure proper airflow, but with a mini split, that’s not a concern.
They’re also incredibly versatile. Got a new addition? A finished basement? A converted attic? A mini split is often the simplest and most efficient solution for climate control in these spaces without having to extend existing ductwork or overhaul your entire HVAC system. Plus, many models offer both heating and cooling, making them a year-round solution.
However, it’s not all sunshine and roses. A DIY installation requires careful planning, attention to detail, and a willingness to learn. You’ll be dealing with electrical wiring, refrigerant lines, and mounting equipment, all of which need to be done correctly for the system to operate safely and efficiently. It’s a rewarding project, but it’s not one to rush or take lightly.
Essential Tools and Materials You’ll Need
Before you even think about cutting holes in your wall, you need to gather your tools and materials. Having everything on hand before you start will save you countless trips to the hardware store and keep your project moving smoothly. While specific needs might vary slightly by unit, this list covers the essentials:
- Your Mini Split Kit: This includes the indoor unit (evaporator), outdoor unit (condenser), refrigerant lines (often pre-charged with quick connects for DIY kits), communication cable, and condensate drain line.
- Mounting Hardware: Wall brackets for the indoor unit, and a sturdy pad or wall bracket for the outdoor unit.
- Drill and Drill Bits: You’ll need a powerful drill and a large hole saw (typically 2.5 to 3.5 inches) for the line set penetration through the wall. Smaller bits for mounting screws.
- Level: Crucial for ensuring both units are installed straight.
- Measuring Tape: For accurate placement and line measurements.
- Screwdrivers: Philips and flathead.
- Wrenches: Adjustable wrenches for tightening line set connections.
- Wire Strippers and Crimpers: For electrical connections.
- Pliers: Needle-nose and standard.
- Vacuum Pump and Manifold Gauge Set (if not a quick-connect system): This is absolutely critical for systems that require field evacuation and charging. You can often rent these from tool rental places or HVAC supply stores.
- Refrigerant Leak Detector: An electronic one is best for finding tiny leaks.
- Flaring Tool (if lines are not pre-flared or quick connect): For custom line lengths.
- Tube Cutter: For cleanly cutting copper refrigerant lines if you’re custom fitting.
- Pipe Bender: To carefully bend copper lines without kinking.
- Caulk and Weatherproof Sealant: To seal the wall penetration.
- Electrical Meter (Multimeter): For checking voltage and ensuring circuits are de-energized.
- Safety Gear: Gloves, safety glasses, and sturdy work boots.
- Line Set Cover Kit: Optional, but highly recommended for a clean, professional look and protection for the outdoor lines.
Don’t skimp on safety gear or critical tools like the vacuum pump. Improper evacuation of the lines is one of the biggest DIY mistakes and will lead to system failure and costly repairs down the road.
Sizing Your Mini Split System Correctly
This is arguably the most important step. Get this wrong, and your system won’t perform efficiently, no matter how perfectly you install it. An undersized unit will run constantly, struggling to reach the set temperature, leading to high energy bills and premature wear. An oversized unit will short-cycle, meaning it turns on and off too frequently. This wastes energy, doesn’t adequately dehumidify the air, and also leads to unnecessary wear and tear. It’s similar to trying to figure out what size furnace for 1000 sq ft – you need to factor in many variables.
Sizing isn’t just about square footage. Here’s what you need to consider:
- Square Footage: This is your starting point. As a very rough rule of thumb, you need about 20 BTU per square foot. So, a 500 sq ft room would need approximately 10,000 BTUs (or 1 ton is 12,000 BTUs). However, this is just a baseline.
- Ceiling Height: Taller ceilings mean more air volume to heat or cool.
- Insulation Quality: A well-insulated room will require less BTU capacity than a poorly insulated one. Think about your walls, attic, and floor insulation.
- Window Size and Type: Large, single-pane windows facing south will let in a lot of heat, requiring more BTUs. Energy-efficient, double-pane windows reduce this load.
- Sun Exposure: Rooms that get a lot of direct sunlight will need more cooling capacity.
- Climate Zone: Naturally, someone in Florida needs more cooling capacity than someone in Minnesota, even for the same size room.
- Number of Occupants: People generate heat.
- Heat-Generating Appliances: Computers, TVs, kitchen appliances – they all contribute to the heat load.
Don’t just guess. Use an online BTU calculator specifically designed for mini splits, or better yet, consult a professional for a load calculation. Many manufacturers provide detailed sizing guides based on geographical location and construction types. If you’re on the fence between two sizes, it’s generally better to go slightly undersized than significantly oversized, especially for cooling, as it allows the unit to run longer cycles, which helps with dehumidification.
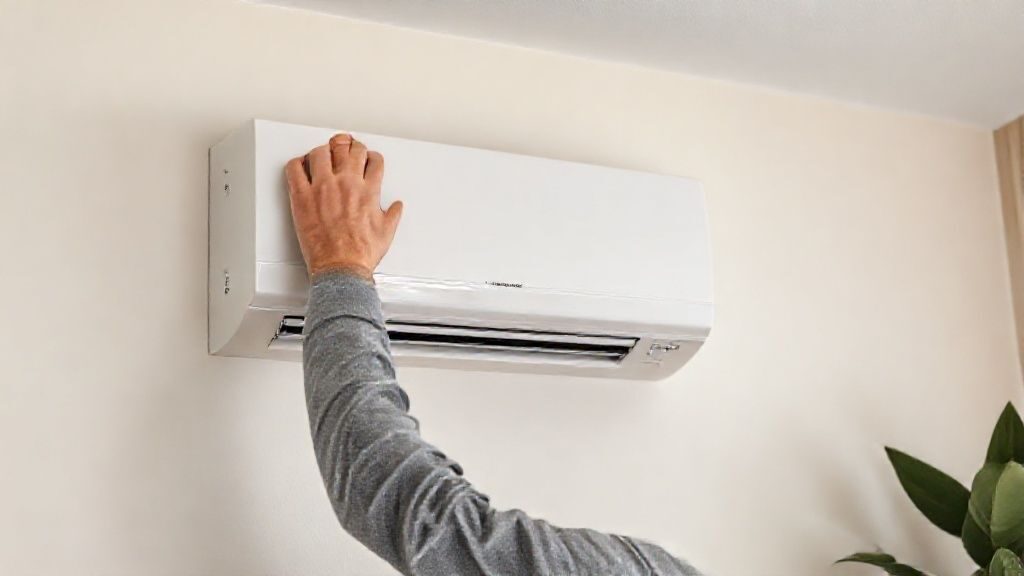
Mounting the Indoor Unit (Evaporator)
This is where the visible part of your mini split will live, so aesthetics and functionality both matter. The indoor unit, also known as the evaporator, should be mounted high on a wall, typically 6-8 inches from the ceiling, centered for best air distribution. Make sure there’s enough clearance around it for maintenance and proper airflow. Avoid placing it directly above a heat source like a radiator, or where direct sunlight will hit it, as this can confuse the thermostat.
Most indoor units come with a metal mounting plate. This plate needs to be screwed securely into wall studs. If you can’t hit studs, use heavy-duty wall anchors appropriate for the weight of the unit. Use your level to ensure the plate is perfectly horizontal. This is crucial for the condensate drain line to function correctly; if it’s not level, water won’t drain and could back up, causing leaks.
Once the mounting plate is secure, you’ll need to drill a hole through the wall for the line set. This hole usually goes to the outside, directly behind or slightly below the indoor unit. Most manufacturers specify the size (often 2.5 to 3.5 inches in diameter) and angle (slightly sloped downwards towards the outside) for this hole. Use your hole saw and make sure it’s angled correctly to allow for proper drainage and to prevent water from entering your home. I’ve seen plenty of water damage from folks not getting that angle right.
After drilling, carefully feed the refrigerant lines, communication cable, and condensate drain line through the hole. Make sure they are not kinked or damaged during this process. Now you can hang the indoor unit on the mounting plate. Most units have hooks or clips that securely attach them. Once it’s on, double-check that it feels stable and is level.
Installing the Outdoor Unit (Condenser)
The outdoor unit, or condenser, is the noisy workhorse of the system, so its placement needs careful consideration. It needs to be on a stable, level surface, away from direct sunlight if possible (though some direct sun is unavoidable), and with plenty of clearance for airflow. Manufacturers specify minimum clearances from walls and other obstructions, usually 12-24 inches on the sides and back, and several feet above.
- Ground Mount: The most common method. Use a pre-formed concrete or heavy-duty plastic pad on a level gravel base. This elevates the unit slightly, protecting it from snow, ice, and lawn irrigation. Ensure the pad is perfectly level.
- Wall Mount: Less common, but useful in areas prone to heavy snow or flooding, or for maintaining space on small patios. You’ll need specialized heavy-duty wall brackets securely fastened to the exterior studs of your home. Again, ensure it’s level.
Place the outdoor unit on your chosen pad or brackets. Make sure it’s firmly secured and perfectly level to ensure the compressor operates correctly and for proper oil return to prevent wear. Connect the refrigerant lines, communication cable, and condensate drain line from the indoor unit to the appropriate ports on the outdoor unit. Make sure your lines are routed neatly and protected from damage. Some people use a line set cover kit to hide and protect these lines, giving a much cleaner, more professional finish to the installation.
Connecting Refrigerant Lines: The Crucial Step
This is where attention to detail is paramount. The refrigerant lines (the copper tubes) carry the refrigerant between the indoor and outdoor units. Most DIY mini splits come with pre-charged lines and quick-connect fittings, which significantly simplify this step. If you have such a system, follow the manufacturer’s instructions exactly.
For quick-connect systems:
- Carefully uncoil the refrigerant lines, avoiding kinks.
- Connect the larger diameter line to the larger port on both the indoor and outdoor units.
- Connect the smaller diameter line to the smaller port on both units.
- Tighten the quick-connect fittings firmly by hand, then use wrenches to give them a final, snug tightening. Do NOT overtighten, as this can damage the seals.
- Once connected, you’ll typically open a valve on the outdoor unit to release the pre-charged refrigerant into the lines. There’s often a small valve cap you remove, then use an Allen key to open the valve fully. Listen for a hiss; this is normal as the refrigerant flows.
- Apply a leak detection spray (soapy water works) to all connections. Look for bubbles, which indicate a leak. If you see bubbles, tighten the connection slightly and re-check.
If your system does NOT have quick-connects, or if you’re cutting lines to length:
- You’ll need a tube cutter to make clean, square cuts.
- Then, a flaring tool is essential to create perfect flares on the ends of the copper tubing. This is a skill that takes practice, and a bad flare will absolutely lead to a leak.
- Connect the flared ends to the indoor and outdoor unit ports, using two wrenches (one to hold the unit’s fitting, one to tighten the line nut) to avoid damaging the unit’s ports.
- Crucially, for these systems, you MUST vacuum the lines. This removes all air and moisture from the refrigerant lines. Connect a vacuum pump and a manifold gauge set to the service port on the outdoor unit. Pull a vacuum down to at least 500 microns and hold it for 30-60 minutes to ensure there are no leaks and all moisture has boiled off. This step cannot be skipped or rushed.
- After vacuuming, you’ll release the refrigerant from the outdoor unit.
- Again, use leak detection spray on all connections.
Improper refrigerant handling is not just bad for your unit; it’s also bad for the environment and can be illegal in some jurisdictions without proper certification. So, if you’re not comfortable with this step on a non-quick-connect system, seriously consider calling in a professional.
Making Electrical Connections Safely
Working with electricity can be dangerous, so if you’re not confident in your electrical skills, hire a licensed electrician for this part. Safety is not negotiable. Always turn off the power at the breaker before starting any electrical work. Confirm it’s off with a multimeter.
Most mini splits require a dedicated 240V circuit for the outdoor unit, though smaller 120V units exist. The indoor unit usually gets its power through the communication cable from the outdoor unit, or sometimes a separate 120V circuit. Check your unit’s manual for specific electrical requirements.
The outdoor unit will have a wiring terminal block. You’ll connect the power supply wires (typically two hot wires, a neutral, and a ground) from your disconnect box to this block. Use appropriately sized wire for the amperage of your unit. The disconnect box should be installed within sight of the outdoor unit, typically 5-10 feet away, so you can easily cut power during service.
The communication cable connects the indoor unit to the outdoor unit. This cable usually has several insulated wires (e.g., L1, L2, N, Ground). You’ll match the wire colors or numbers from the indoor unit’s terminal block to the outdoor unit’s terminal block. This cable carries both control signals and often the power for the indoor unit. Double-check these connections meticulously. A wrong connection here can cause operational errors or even damage the circuit boards.
Once all connections are made, ensure all terminal screws are tight and that no bare wires are exposed. Re-attach all electrical covers securely. Only then should you restore power at the main breaker.
Vacuuming the Lines and Leak Testing
This section is mainly for systems that are not pre-charged with quick-connect lines. However, even with quick-connect systems, a leak test is always a good idea.
For Systems Requiring a Vacuum Pump:
As I mentioned, this step is vital. Air and moisture in the refrigerant lines will mix with the refrigerant, forming acids and sludge that will destroy your compressor and greatly reduce efficiency. This is often the reason why DIY units fail prematurely.
- Connect Manifold Gauge Set: Attach the blue hose from your manifold gauge set to the low-pressure service port on the outdoor unit, and the yellow (or center) hose to your vacuum pump.
- Start Vacuum Pump: Open the low-side valve on your manifold gauge set and turn on the vacuum pump.
- Pull a Deep Vacuum: Let the pump run until the gauge reads at least 500 microns (a deep vacuum). This can take anywhere from 30 minutes to a few hours, depending on line length and pump size.
- Hold the Vacuum: Close the low-side valve on the manifold gauge set, then turn off the vacuum pump. Watch the gauge for at least 30 minutes. If the vacuum holds steady, you’re good. If it rises, you have a leak that needs to be found and fixed before proceeding.
- Release Refrigerant: Once the vacuum holds, you can slowly open the service valves on the outdoor unit (typically with an Allen wrench) to release the pre-charged refrigerant into the lines.
Leak Testing for All Systems:
Even with quick-connects, a quick leak test is cheap insurance.
- Soapy Water Method: Mix dish soap with water to create a thick, sudsy solution.
- Apply to Connections: Brush or spray this solution generously over all refrigerant line connections at both the indoor and outdoor units.
- Look for Bubbles: If there’s a leak, you’ll see bubbles forming as the refrigerant slowly escapes.
- Electronic Leak Detector: For more sensitive detection, an electronic leak detector is excellent. Pass the probe around all connections. It will beep or light up if it detects refrigerant.
- Fix Leaks: If you find a leak, gently tighten the connection. If it persists, you may need to disconnect, inspect the flare or seal, and re-connect. For serious leaks, or if you’re not confident, it’s time to call a pro.
Don’t skip this. A tiny leak can slowly drain your refrigerant charge, leading to poor performance and eventual compressor failure.
Final Steps and System Startup
You’re almost there! Once all connections are made, tested, and sealed, you can button everything up.
- Seal the Wall Penetration: Use expanding foam sealant or good quality exterior caulk to seal the hole where the line set passes through the wall. This prevents drafts, insects, and moisture from entering your home.
- Manage Excess Line Set: If you have extra refrigerant line, coil it neatly behind the outdoor unit. Avoid sharp bends or kinks. You can secure it to the wall or the outdoor unit with ties.
- Install Line Set Cover (Optional): If you purchased a line set cover kit, install it now. This not only protects your lines from UV damage and physical impact but also gives a much cleaner, finished appearance to your installation.
- Secure Condensate Drain: Ensure the condensate drain line slopes continuously downwards to an appropriate discharge point, away from your foundation. Never let it drain into a flowerbed or where it could create a muddy mess. It needs an unobstructed path. If it drains near a walkway, consider how it will behave in freezing temperatures.
- Power Up: With all covers in place and connections checked, turn the power back on at the main electrical panel.
- First Startup: Turn on your mini split system using the remote control. Start it in cooling mode first, then try heating mode. Listen for unusual noises and check for proper operation. The indoor unit should start blowing air, and the outdoor unit fan and compressor should engage.
- Check Airflow and Temperature: Feel the air coming out of the indoor unit. It should be noticeably cooler or warmer than the room air, depending on the mode. Give the system about 15-30 minutes to settle and reach its operating parameters.
Congratulations, you’ve installed your own mini split! Monitor its performance closely for the first few days.
Troubleshooting Common DIY Mini Split Issues
Even with careful installation, things can sometimes go sideways. Here are a few common issues and what to check:
- No Power to Unit:
- Check the breaker at your main panel.
- Check the disconnect box outside near the outdoor unit.
- Verify all electrical connections are tight and correct at both units.
- Unit Not Cooling/Heating Effectively:
- Thermostat Settings: Is it set to the correct mode and temperature?
- Airflow Obstruction: Is the filter dirty? Is anything blocking the indoor unit’s intake or output? Is the outdoor unit’s coil blocked by debris?
- Refrigerant Leak/Low Charge: This is a big one. If your system ran fine for a bit then performance dropped, you likely have a leak. You’ll need to find and fix it, then evacuate and recharge the system. This usually requires a pro.
- Dirty Coils: Both indoor and outdoor coils can get dirty, impeding heat transfer. Clean them gently.
- Water Leaking from Indoor Unit:
- Clogged Drain Line: This is the most common cause. The condensate drain line can get clogged with algae or debris. Try flushing it with a bleach/water solution or using a wet/dry vacuum to suck out the clog.
- Improper Slope: If the drain line isn’t continuously sloped downwards, water will sit and eventually overflow.
- Frozen Coil: If the indoor coil is frozen, it’s often due to low refrigerant, dirty air filter, or obstructed airflow. Defrost it, then investigate the underlying cause.
- Strange Noises:
- Vibrations: Check if either unit is rattling against a wall or an unsecured mounting.
- Fan Blade Obstruction: Something might be hitting the fan blades.
- Refrigerant Noises: Gurgling or hissing can be normal as refrigerant flows, but loud or constant noises might indicate issues.
- Communication Errors:
- Check all communication wire connections for tightness and correct pairing (e.g., L1 to L1, N to N). Often, error codes on the unit’s display will point to communication issues.
When in doubt, consult your unit’s troubleshooting guide in the manual. Many problems have specific error codes that will help you pinpoint the issue.
When to Consider Professional HVAC Help
While I encourage the DIY spirit, there are definitely times when it makes sense to bring in a professional. Knowing your limits is part of being a good homeowner and a smart DIYer. If you’re feeling overwhelmed at any point, or encounter something beyond your comfort level, don’t hesitate. For something as important as your home’s climate control, it’s worth it.
- Complex Sizing: If your space has unusual characteristics (very high ceilings, lots of glass, unique insulation issues), getting a professional load calculation ensures you buy the right size unit.
- Electrical Work Beyond Your Skill: If you need to run a new dedicated circuit and aren’t comfortable with main panel work, hire a licensed electrician. This isn’t just about functionality; it’s about safety and meeting local codes.
- Vacuuming and Refrigerant Charging: For systems that aren’t pre-charged with quick-connects, proper vacuuming and charging requires specialized tools and knowledge. Releasing refrigerant into the atmosphere is illegal and harmful. If you’re not equipped for this, pay a certified technician.
- Persistent Leaks: If you’ve found and re-tightened connections but still have a leak, a pro has specialized tools and experience to pinpoint and repair it.
- Warranty Concerns: Some manufacturers might void certain parts of the warranty if the system isn’t installed by a licensed professional. Check your warranty terms carefully before starting.
- Local Codes and Permits: Always check your local building codes. Some areas require permits for HVAC installations, even DIY, and may require inspections by a certified professional. Ignoring these can lead to fines or issues when selling your home.
- You Hit a Wall: Literally or figuratively. If you’ve followed all the steps, troubleshot common issues, and the system still isn’t working right, it’s time to call in someone with more advanced diagnostic tools and experience.
Remember, the goal is a safely and efficiently operating system. Sometimes, a partial DIY job where you do the mounting and line routing, then pay a pro for the electrical and refrigerant connections, is the best compromise. If you’re looking for professional services or just need a quote, you can always contact us for a quote. We’re here to help, whether you need full installation or just some expert advice on the best hvac solutions.
Maximizing Efficiency with Your New Mini Split
You’ve invested the time and effort to install your mini split; now let’s make sure it runs as efficiently as possible to save you money and keep you comfortable.
- Regular Filter Cleaning: This is the easiest and most impactful maintenance task. Mini split filters are typically washable. Clean them every 2-4 weeks during heavy use (or monthly, at minimum). A dirty filter restricts airflow, making the unit work harder and consume more energy.
- Keep Coils Clean: Periodically inspect the indoor and outdoor coils. For the outdoor unit, keep vegetation clear around it and hose down the coil fins gently to remove dirt and debris. For the indoor unit, if accessible, gently clean the coil with a soft brush and approved coil cleaner.
- Set Appropriate Temperatures: Don’t crank the AC down to 60°F or the heat up to 85°F. Find a comfortable temperature (e.g., 72-78°F in summer, 68-72°F in winter) and stick to it. Every degree you adjust makes a difference.
- Use Timers and Sleep Modes: Most mini splits have programmable timers and “sleep” modes that slightly adjust the temperature overnight, saving energy when you’re less active.
- Utilize Fan-Only Mode: On mild days, sometimes just circulating air with the fan is enough to feel comfortable without engaging the compressor.
- Zoned Control: This is the beauty of mini splits. Turn off units in unoccupied rooms. No need to condition spaces you’re not using.
- Address Air Leaks: Even the best HVAC system can’t overcome a drafty house. Seal air leaks around windows and doors, and improve insulation where needed.
- Consider Supplementary Systems: While mini splits handle temperature, you might still want to consider an ac humidifier combo for optimal indoor air quality, especially in very dry or humid climates.
Proper maintenance and smart usage habits will ensure your DIY mini split system provides efficient and reliable comfort for years to come.
FAQ
Q: Can anyone install a mini split?
A: While many aspects of mini split installation are within the capabilities of a handy homeowner, the electrical connections and especially the handling of refrigerants (vacuuming and charging non-quick-connect systems) require specific knowledge and tools. If you’re not comfortable with these steps, it’s wise to hire a professional for those specific parts.
Q: Do I need a permit to install a mini split myself?
A: It depends on your local municipality. Many areas require permits for HVAC installations, even DIY ones, to ensure they meet safety and energy codes. Always check with your local building department before starting work.
Q: What’s the biggest mistake DIYers make with mini splits?
A: The most common and damaging mistake is improper handling of the refrigerant lines, specifically not properly evacuating (vacuuming) the lines to remove air and moisture, or failing to detect and fix leaks. This contaminates the system and leads to premature compressor failure.
Q: How long does a DIY mini split installation typically take?
A: For a single zone unit, a competent DIYer with all tools and materials on hand can often complete the installation in one full day, or over a weekend. More complex multi-zone systems will take longer. Don’t rush it; taking your time ensures a better outcome.
Q: Are quick-connect mini splits truly DIY-friendly?
A: Yes, quick-connect systems are designed to be much more DIY-friendly as they eliminate the need for specialized flaring tools and vacuum pumps for the refrigerant lines. However, you still need to be careful with electrical connections and ensure proper mounting and line routing.
Q: Can I shorten the refrigerant lines if they are too long?
A: For quick-connect systems, generally no. These systems come with pre-charged lines and are not designed to be cut and re-flared by a DIYer. For traditional systems, yes, you can shorten lines, but this requires specialized tools (tube cutter, flaring tool) and the knowledge to properly evacuate and potentially recharge the system, which is best left to a professional.
Final Thoughts
Taking on a DIY mini split installation is a significant project, but it’s one that many homeowners successfully complete. It offers a chance to save money, gain a deeper understanding of your home’s systems, and enjoy the satisfaction of a job well done. The key is thorough preparation, attention to detail, and a healthy respect for the technical aspects involved. Don’t cut corners, especially when it comes to electrical safety and refrigerant handling. If any step feels too daunting, or if you encounter unexpected challenges, remember that professional help is always available and often a wise investment for critical components. With careful planning and execution, you’ll be enjoying efficient, personalized comfort in your home for years to come.