As an HVAC technician with decades under my belt, I’ve seen just about everything when it comes to air conditioning systems. One component that consistently causes trouble, yet often gets overlooked by homeowners, is the aircon coil. These coils are the unsung heroes of your cooling system, quietly working behind the scenes to keep your home comfortable. Understanding what they are, how they work, and why they need care can save you a lot of headaches and money in the long run.
I recall a job once in Denver, Colorado, where a homeowner was convinced his AC unit was on its last leg. It was struggling to keep the house cool during a hot summer, and the energy bills were through the roof. After a thorough inspection, the issue wasn’t a failing compressor or a major refrigerant leak, but rather severely neglected condenser coils. They were caked with cottonwood fluff, dust, and general outdoor grime, basically suffocating the unit. A good, professional cleaning was all it took to get that system running like new again. It’s a common scenario, and it perfectly illustrates why paying attention to your coils is so crucial.
Key Highlights
- Aircon coils are essential: They are where heat transfer happens, either absorbing heat from your home (evaporator) or releasing it outside (condenser).
- Two main types: Evaporator coils are indoors, condenser coils are outdoors. Both require different care.
- Common problems: Leaks, dirt accumulation, and freezing are frequent issues that reduce efficiency and system lifespan.
- Regular cleaning is vital: Keeping coils clean ensures optimal performance, lower energy bills, and better indoor air quality.
- DIY vs. Professional: You can handle basic cleaning, but complex issues like leaks or persistent freezing require a certified technician.
- Repair or Replace: The decision depends on the system’s age, extent of damage, and cost-effectiveness.
What Are Air Conditioner Coils and How Do They Work?
At the heart of every air conditioning system, whether it’s a central unit or a mini-split, are the coils. These are essentially long, winding tubes made of copper or aluminum, surrounded by metal fins. They are the primary components responsible for the actual heat exchange that makes your home feel cool. Without them, your AC is just a fan.
The entire process relies on a basic principle of physics: heat moves from warmer areas to colder areas. Your air conditioner doesn’t “create” cold; it moves heat. This heat transfer is facilitated by a chemical refrigerant that cycles through your system, changing state from a liquid to a gas and back again.
Here’s a simplified breakdown:
- Heat Absorption (Evaporator Coil): Warm air from inside your home is blown over the indoor evaporator coil. The refrigerant inside this coil is cold and at a low pressure. As the warm indoor air passes over it, the refrigerant absorbs the heat, causing it to evaporate and turn into a low-pressure gas. The air, now cooler, is then circulated back into your home.
- Heat Rejection (Condenser Coil): This gaseous refrigerant, now carrying the heat from your home, is then pumped outside to the outdoor condenser coil. Here, the refrigerant is compressed, which increases its temperature and pressure significantly. As this hot, high-pressure gas moves through the condenser coil, a fan blows ambient outdoor air over the coil. This outdoor air is cooler than the refrigerant inside the coil, so the refrigerant releases its heat to the outside air, condensing back into a high-pressure liquid.
- Cycle Continues: This high-pressure liquid then flows back indoors, passes through an expansion valve (which lowers its pressure and temperature), and returns to the evaporator coil to start the cycle all over again.
Both coils are critical, and if either one isn’t performing correctly, the entire system struggles. They are designed to maximize surface area to allow for efficient heat transfer, which is why you see all those thin fins packed tightly together.
Types of Air Conditioner Coils: Evaporator vs. Condenser
While both evaporator and condenser coils facilitate heat transfer, they operate at different points in the refrigeration cycle and face different environmental challenges.
Evaporator Coils (Indoor Unit)
The evaporator coil is located in your indoor unit, usually housed within your furnace or air handler. It’s often found above the furnace, right where the return air duct meets the supply air duct. Its primary job is to absorb heat and moisture from your indoor air. When warm, humid air from your home passes over this coil, the cold refrigerant inside pulls the heat out of the air. As the air cools, moisture also condenses on the coil’s surface, similar to how condensation forms on a cold glass of water. This moisture then drips into a drain pan and is typically routed outside through a condensate line.
Because it’s indoors, the evaporator coil is generally protected from harsh weather, but it’s still susceptible to dust, pet dander, and other airborne contaminants that bypass your air filter. When these particles accumulate, they create a barrier that inhibits heat exchange, making your system work harder.
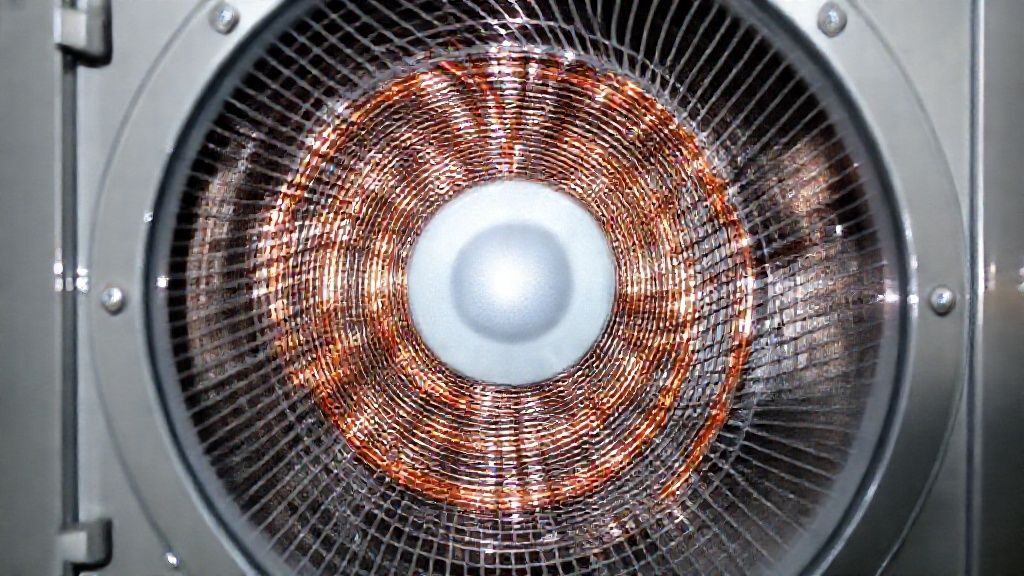
Condenser Coils (Outdoor Unit)
The condenser coil is part of the outdoor unit of your central air conditioner. It’s the large, usually square-shaped component with fins wrapped around the sides. Its purpose is to release the heat absorbed from your home into the outside air. After the refrigerant absorbs heat indoors and is compressed, it arrives at the condenser coil as a hot, high-pressure gas. The fan on top of the outdoor unit pulls air through the coil, helping to dissipate this heat. As the heat escapes, the refrigerant condenses back into a liquid state.
Given its outdoor location, the condenser coil is exposed to all sorts of environmental elements: dirt, dust, leaves, grass clippings, pet hair, pollen, and even extreme weather. This makes it particularly vulnerable to becoming dirty and obstructed, which directly impedes its ability to shed heat. A dirty condenser coil means your AC unit can’t get rid of the heat efficiently, leading to higher energy consumption and reduced cooling capacity.
Common Problems Affecting Aircon Coils (Leaks, Dirt, Freezing)
Despite their robust construction, aircon coils are prone to a few common issues that can significantly impact your system’s performance and lifespan. Understanding these problems is the first step toward preventing them.
Refrigerant Leaks
Coil leaks are a persistent headache for many homeowners. They occur when small cracks or holes develop in the copper or aluminum tubing of the coils, allowing refrigerant to escape. Common causes include:
- Formic Acid Corrosion: This is a major culprit, particularly for evaporator coils. Volatile organic compounds (VOCs) present in household items like cleaning products, paints, and even pressed wood furniture can react with moisture and copper to form formic acid, which slowly eats away at the coil tubing.
- Pitting Corrosion: Often caused by sulfur compounds in the air, creating small pits that eventually lead to leaks.
- Manufacturing Defects: Though rare, coils can sometimes leave the factory with microscopic flaws that develop into leaks over time.
- Physical Damage: Accidental damage during installation or maintenance can also cause leaks.
Signs of a refrigerant leak include reduced cooling capacity, the system running constantly, and sometimes a hissing sound. If your system is low on refrigerant, it’s not just about topping it off; the leak needs to be found and repaired, as refrigerant is both environmentally harmful and expensive.
Dirt and Grime Accumulation
This is arguably the most common problem and the easiest to prevent. Both evaporator and condenser coils are designed with thin fins to maximize surface area for heat transfer. However, these fins also act like filters, catching airborne particles. For evaporator coils, this means indoor dust, pet dander, and other allergens. For condenser coils, it’s outdoor debris like leaves, grass clippings, dirt, and pollen. Even lint from clothes dryers can be drawn into the outdoor unit.
When dirt builds up, it forms an insulating layer over the coils. This barrier prevents the coils from effectively absorbing or releasing heat. The result? Your AC system has to work much harder and run longer to achieve the desired temperature, leading to:
- Reduced Efficiency: Higher energy bills because the system is constantly struggling.
- Decreased Cooling Performance: Your home won’t get as cool as it should, or it will take much longer.
- Increased Wear and Tear: Overworked components lead to premature failure of other parts, like the compressor.
- “Dirty Sock Syndrome”: A common issue with dirty evaporator coils where bacteria and mold grow on the coil, producing a musty, stale odor when the AC runs.
Coil Freezing
While it might seem counterintuitive for an air conditioner, coils can actually freeze solid. This typically happens to the evaporator coil. When the coil freezes, it’s usually a symptom of another underlying problem, not the problem itself. Common causes include:
- Low Refrigerant: If there’s a leak, low refrigerant pressure causes the remaining refrigerant to get too cold, dropping the coil temperature below freezing.
- Restricted Airflow: This is a major factor. A dirty air filter, blocked return air vents, or a malfunctioning blower fan can all reduce the amount of warm air flowing over the evaporator coil. Without enough warm air to absorb the cold, the coil’s surface temperature drops below freezing.
- Dirty Coils: A thick layer of dirt on the evaporator coil acts as an insulator, preventing proper heat absorption and causing the coil to get excessively cold and freeze.
- Blower Motor Issues: A weak or failing blower motor can’t move enough air across the coil.
- Closed Vents: Closing too many supply vents can also restrict airflow, leading to freezing.
A frozen coil prevents heat exchange entirely. You’ll notice little to no cold air coming from your vents, and you might even see ice forming on the refrigerant lines outside. If you discover a frozen coil, the immediate action is to turn off the AC (but keep the fan running if possible) and let it thaw completely before investigating the root cause.
The Importance of Regular Aircon Coil Cleaning and Maintenance
I can’t stress this enough: regular cleaning and maintenance of your aircon coils are non-negotiable if you want your system to run efficiently, last longer, and keep your home comfortable. Neglecting your coils is like driving a car without ever changing the oil – it’ll run for a while, but it’s going to break down much sooner and cost you more in the long run.
Enhanced Energy Efficiency
Clean coils are efficient coils. When coils are free of dirt and debris, heat transfer occurs exactly as designed. The evaporator coil can absorb heat quickly, and the condenser coil can release it efficiently. This means your system doesn’t have to work as hard or run as long to reach your desired temperature. The result? Significant savings on your monthly energy bills. A system with dirty coils can consume anywhere from 5% to 20% more energy than a clean one.
Extended System Lifespan
When coils are dirty or damaged, the entire HVAC system is under increased stress. The compressor, the heart of your AC, has to work harder to compensate for inefficient heat exchange. This extra strain leads to premature wear and tear on the compressor and other vital components. Regular cleaning and prompt attention to issues like leaks or freezing can prevent these larger, more expensive breakdowns, thereby extending the overall lifespan of your air conditioning unit. Investing in maintenance is far cheaper than replacing a compressor or an entire system.
Improved Indoor Air Quality
As mentioned with “dirty sock syndrome,” evaporator coils can become breeding grounds for mold, mildew, bacteria, and other allergens if they are perpetually wet and dirty. When your system operates, these contaminants can be released into your home’s air, exacerbating allergies, asthma, and other respiratory issues. Clean coils, combined with a good air filter, contribute significantly to healthier indoor air quality, making your home a more pleasant and safer environment, especially for sensitive individuals.
Consistent Cooling Performance
You bought an air conditioner to cool your home reliably. Dirty coils compromise this ability. A well-maintained system with clean coils will deliver consistent, powerful cooling throughout your home. You won’t experience hot spots, long cooling cycles, or a system that struggles to keep up on the hottest days. The difference in comfort between a neglected system and a properly maintained one is immediately noticeable.
Preventative Measure Against Costly Repairs
Many of the major, expensive repairs I’ve performed over the years could have been avoided with simple, routine maintenance. A dirty coil can lead to compressor failure, fan motor burnout, or even complete system replacement. By catching problems early through regular cleaning and professional tune-ups, you can address minor issues before they escalate into major breakdowns. This proactive approach saves you from emergency repair costs and the inconvenience of a non-functional AC system during peak season.
DIY Aircon Coil Cleaning: A Step-by-Step Guide
While some aspects of coil maintenance are best left to professionals, you can certainly handle basic cleaning of both your indoor evaporator coil and outdoor condenser coil. This DIY guide will help you keep things running smoothly. Just remember, safety first.
Safety Precautions Before You Start
- Turn Off Power: This is absolutely critical. Locate the main electrical disconnect switch for your outdoor unit (usually a small box on the wall near the unit) and switch it off. For the indoor unit, turn off the power at your main electrical panel for the furnace/air handler. You don’t want any power going to the unit while you’re working on it.
- Wear Gloves and Eye Protection: Coil cleaners can be harsh, and outdoor units can have sharp fins.
Cleaning the Outdoor Condenser Coil
- Clear Away Debris: Start by removing any large debris around the unit – leaves, grass clippings, twigs, etc. Aim for at least a two-foot clearance around all sides of the unit.
- Remove Top Grille/Fan Guard: Carefully unscrew and lift off the top grille that protects the fan. Be gentle and set it aside. You might need to disconnect the fan motor wiring if it’s attached to the grille, but often you can just prop the grille up without disconnecting everything. Be careful not to damage the fan blades.
- Vacuum Loose Dirt: Use a shop vac with a brush attachment to gently vacuum any loose dirt, dust, or pet hair from the exterior of the coil fins. Work from top to bottom.
- Hose Down the Coils: Using a garden hose with moderate water pressure (no pressure washer!), spray the coils from the inside out. This helps push debris outward through the fins. Be careful not to spray directly into any electrical components.
- Apply Coil Cleaner: Purchase a specialized non-acidic coil cleaner from a hardware store. Follow the manufacturer’s instructions carefully. Many cleaners are spray-on, foam-up, and then rinse-off. Allow the cleaner to penetrate for the recommended time (usually 5-10 minutes).
- Rinse Thoroughly: Rinse the coils thoroughly with your garden hose, again from the inside out, until all traces of the cleaner are gone.
- Straighten Fins (Optional): Over time, the delicate aluminum fins can get bent, restricting airflow. If you notice bent fins, you can gently straighten them with a specialized fin comb (available at hardware stores). Be very careful, as these fins are fragile.
- Reassemble: Once everything is clean and dry, reattach the fan guard/grille, restore power, and test your unit.
Cleaning the Indoor Evaporator Coil
Cleaning the evaporator coil is a bit trickier because it’s enclosed. If you’re uncomfortable opening up your indoor air handler, this is a good job to leave to a professional.
- Access the Coil: Turn off power at the breaker. Locate your indoor air handler or furnace. You’ll need to open the access panel that covers the evaporator coil. This often involves unscrewing a few panels. Be prepared; this area can be dirty.
- Clean Drain Pan: Check the condensate drain pan beneath the coil. It often collects sludge, mold, and algae. Clean it out with a brush and a solution of bleach and water (1 part bleach to 10 parts water) or a specialized pan tablet. Make sure the drain line isn’t clogged.
- Remove Large Debris: Carefully brush off any large clumps of dust or debris from the coil and fins. A soft brush or shop vac with a brush attachment works well.
- Apply Evaporator Coil Cleaner: Use a specialized, non-rinse evaporator coil cleaner (these often come in an aerosol can). Spray it evenly over the coil’s surface, following the product’s instructions. These cleaners are designed to foam up, break down grime, and then drip into the drain pan with the condensation, requiring no rinsing.
- Reassemble and Restore Power: Once you’ve applied the cleaner and allowed it to work, replace the access panels, restore power, and turn on your AC.
Remember, a dirty air filter is the number one cause of dirty evaporator coils. Change your air filter regularly, every 1-3 months depending on usage and household conditions. This simple step protects your coils more than anything else.
When to Call a Professional for Aircon Coil Service
While DIY cleaning can address surface dirt, there are many situations where a professional HVAC technician is not just recommended, but absolutely necessary. Knowing when to call in the experts can prevent further damage and ensure your system is handled correctly.
Persistent Coil Freezing
If your evaporator coil repeatedly freezes, even after you’ve checked and replaced the air filter, it’s a strong indicator of a deeper problem. This could be a significant refrigerant leak, a malfunctioning blower motor, a faulty thermostat, or a severe clog in the condensate drain line. These issues require specialized diagnostic tools and expertise to pinpoint and repair safely and effectively. Simply thawing the coil won’t solve the underlying problem, and it will just refreeze.
Refrigerant Leaks
If you suspect a refrigerant leak (e.g., your system isn’t cooling well, you hear a hissing sound, or you see ice on the refrigerant lines outside), do not attempt to fix it yourself. Refrigerant is a regulated substance, and handling it requires EPA certification. A professional will have the equipment to precisely locate the leak, repair it, and then properly recharge your system with the correct amount and type of refrigerant. “Topping off” refrigerant without fixing the leak is a temporary and costly solution.
Deep Cleaning of Severely Dirty Coils
For coils that haven’t been cleaned in years and are heavily caked with grime, a DIY spray-and-rinse might not be enough. Professional technicians have access to stronger, more effective cleaning agents and specialized tools that can thoroughly clean deeply embedded dirt without damaging the delicate fins or internal components. They can also access coils that are difficult for a homeowner to reach.
Coil Damage or Corrosion
If you notice physical damage to the coils (e.g., deeply bent fins, signs of pitting, or significant corrosion), a professional needs to assess the extent of the damage. While minor fin bending can be fixed with a fin comb, severe damage might compromise the coil’s integrity, potentially leading to leaks or inefficient operation that requires more intensive repair or even replacement.
Annual Maintenance and Tune-Ups
Even if you’re diligent about DIY cleaning, I always recommend scheduling an annual professional tune-up for your entire HVAC system. During these visits, technicians don’t just clean the coils; they also:
- Inspect and clean the condensate drain line.
- Check refrigerant levels and pressures.
- Test electrical connections and components.
- Lubricate moving parts.
- Verify thermostat accuracy.
- Ensure proper airflow.
- Catch potential problems before they become costly breakdowns.
These comprehensive checks ensure that your entire system is operating at peak efficiency and can often uncover issues with other components that could indirectly affect coil performance. Think of it as an annual physical for your AC.
Repair vs. Replacement: Making the Right Decision for Your Coils
When your aircon coils develop a significant problem, especially a leak, you’ll eventually face a tough decision: should you repair the existing coil or replace the entire unit? This isn’t always a straightforward choice, as it depends on several factors.
Factors to Consider for Repair
- Age of Your System: If your AC unit is relatively new (typically less than 8-10 years old) and the rest of the system is in good condition, a coil repair or replacement might be a cost-effective solution.
- Extent of the Damage: A single, small leak on an accessible part of the coil might be patchable by a professional. However, multiple leaks, or leaks in hard-to-reach areas, make repair much more difficult and less reliable.
- Cost of Repair: Compare the cost of repairing the coil to the cost of a new coil, and then to the cost of a new system. If the repair is minor and inexpensive, it’s likely a good choice.
- Warranty: Check if your coil is still under warranty. Manufacturers often offer separate warranties for coils, which could significantly reduce the cost of a replacement coil.
Factors to Consider for Replacement (of the Coil or the Entire System)
- Multiple or Chronic Leaks: If your coils have had several leaks over a short period, or if the current leak is extensive, it often points to widespread corrosion. Replacing just the coil might only be a temporary fix, and you could face another leak soon.
- Age of the System (Again): If your AC unit is older than 10-12 years, even a single coil leak makes a strong case for full system replacement. An older system is likely nearing the end of its lifespan, and other components (like the compressor or fan motor) might also be failing soon. Investing heavily in an old system often doesn’t make financial sense.
- Efficiency Gains: Modern AC units are significantly more energy-efficient than those manufactured even 5-10 years ago. If you have an older, less efficient system and the coil needs major repair or replacement, upgrading to a new, high-efficiency unit can lead to substantial long-term savings on energy bills. You might even consider options like an induction air conditioner, which represents newer technology for some applications, or dedicated wall ac and heat units for specific room solutions if you’re exploring alternatives to central systems.
- Cost of Coil Replacement: Replacing just an evaporator or condenser coil can be a significant expense, often thousands of dollars, including labor and refrigerant. If this cost approaches half the price of a brand-new system, full replacement becomes a very attractive option. This is especially true if you also consider that a new system comes with a fresh warranty and improved efficiency.
- Compatibility Issues: If you replace only one coil (e.g., just the indoor evaporator coil), it’s crucial that it’s properly matched with your existing outdoor unit. Mismatched components can lead to reduced efficiency and premature failure. Sometimes, it’s just simpler and more effective to replace both units as a matched set.
I always advise homeowners to get a clear breakdown of repair costs versus replacement costs, including estimated energy savings from a new, more efficient unit. Sometimes, the initial sticker shock of a new system is offset by years of lower utility bills and peace of mind. For homes in humid climates, homeowners often consider adding a whole house dehumidifier for hvac to work alongside their AC for optimal comfort and system health, another aspect to factor into a larger system upgrade.
Frequently Asked Questions About Aircon Coils
How often should aircon coils be cleaned?
I recommend cleaning your outdoor condenser coil at least once a year, ideally in the spring before you start heavily relying on your AC. If you live in an area with a lot of dust, pollen, or trees (like cottonwoods), or if you have pets that shed heavily, you might need to clean it more frequently, perhaps every few months. The indoor evaporator coil should be inspected annually by a professional as part of your system’s tune-up. If your air filter is changed regularly (every 1-3 months), the evaporator coil should stay relatively clean between professional services.
Can I use a pressure washer to clean my outdoor condenser coil?
No, absolutely not. Pressure washers are too powerful and can easily bend or damage the delicate aluminum fins on your condenser coil. Bent fins restrict airflow, which defeats the purpose of cleaning the coil. Always use a garden hose with a gentle to moderate spray nozzle, and spray from the inside out if possible to push debris away from the coil. Gentle brushing is acceptable for stubborn dirt.
What causes AC coils to freeze?
Coil freezing (usually the evaporator coil) is almost always caused by a lack of heat transfer. The most common reasons are severely restricted airflow (due to a very dirty air filter, blocked return vents, or a weak blower fan) or low refrigerant levels (due to a leak). Dirty coils can also contribute to freezing by insulating the coil and preventing heat absorption. If your coils are freezing, the first thing to check is your air filter.
How long do AC coils typically last?
With proper maintenance, AC coils can last for 10 to 15 years, often as long as the entire unit. However, factors like environmental conditions (e.g., proximity to coastal areas causing corrosion), poor maintenance, and the presence of corrosive agents (like formic acid in the home) can significantly shorten their lifespan, sometimes leading to leaks in as little as 5-7 years.
What is “dirty sock syndrome”?
Dirty sock syndrome is a distinct, musty odor that some homeowners notice when their AC first kicks on. It’s caused by bacteria, mold, and mildew growing on the damp surface of the evaporator coil. When the fan starts, it blows this odor through your home. Regular professional cleaning of the evaporator coil and ensuring good airflow can often resolve this issue.
Final Thoughts
Your air conditioning coils are the workhorses of your HVAC system, constantly absorbing and releasing heat to keep your home comfortable. While they might seem like a small part, their health directly impacts your system’s efficiency, reliability, and lifespan. Neglecting them is a surefire way to invite higher energy bills, reduced comfort, and costly repairs down the road.
Taking the time for basic DIY cleaning of your outdoor unit and remembering to change your air filter regularly are simple, effective steps you can take to protect your investment. However, for more complex issues like refrigerant leaks, persistent freezing, or for a thorough annual inspection, don’t hesitate to call in a certified HVAC professional. Their expertise ensures your system is running safely and efficiently.
Proactive care of your aircon coils isn’t just about avoiding problems; it’s about maximizing your comfort and getting the most out of your home’s cooling system for years to come. If you’re due for a professional inspection or need help with a stubborn coil issue, don’t hesitate to contact us for a quote. For more helpful tips and advice on maintaining your HVAC system, be sure to read our blog.