After decades of working on HVAC systems, from the humid corners of Florida to the dry plains out west, I can tell you one thing for sure: your heating and cooling system is only as good as its ductwork. And at the heart of proper ductwork performance lies something called CFM, or Cubic Feet per Minute. It’s not just a technical term; it’s the lifeblood of comfortable, efficient airflow in your home or business.
I remember one job in Tampa, Florida, a beautiful old ranch-style house where the homeowners were just roasting in the summer, despite having a relatively new air conditioning unit. Their system was technically sized correctly, but the house never seemed to get cool enough, and their energy bills were through the roof. When I looked into it, it wasn’t a problem with the AC unit itself. The issue was severely undersized return ducts and a jumble of restrictive supply runs. The system simply couldn’t move enough air – the CFM was all wrong – and it was fighting a losing battle. Once we redesigned and re-sized the ductwork, sealing the leaks, and ensuring proper airflow, that house finally became an oasis from the Florida heat. That experience, and many others like it, hammered home the fundamental importance of getting CFM and ductwork right from the start.
Key Highlights
- CFM is Crucial: Cubic Feet per Minute (CFM) dictates how much air your HVAC system moves, directly impacting comfort and efficiency.
- Ductwork is Key: Properly designed and sized ductwork, guided by CFM calculations, is essential for delivering conditioned air effectively.
- Charts are Tools: CFM charts help professionals determine appropriate duct sizes based on air velocity, friction loss, and static pressure.
- Many Factors Matter: Home size, insulation, windows, climate, and even internal heat sources all influence your required CFM.
- Avoid Common Mistakes: Undersized ducts, leaks, and ignoring return air can severely cripple your system’s performance.
- Professional Help is Best: Accurate CFM calculation and duct design are complex tasks best handled by experienced HVAC technicians.
What is CFM (Cubic Feet Per Minute) in HVAC?
Let’s strip away the jargon and get to brass tacks. CFM, or Cubic Feet per Minute, is simply a measurement of airflow volume. Think of it like this: if you have a garden hose, the flow rate might be measured in gallons per minute. For your HVAC system, we’re talking about air, and that air is measured in cubic feet as it moves past a certain point in a minute. So, 1000 CFM means 1000 cubic feet of air is moving through your ductwork every sixty seconds.
Now, why is this so important for your heating and air conditioning? Well, your furnace or air handler conditions a certain amount of air, either heating it up or cooling it down. For that conditioned air to do its job – meaning, making your living space comfortable – it needs to be delivered consistently and effectively to every room. If your system is designed to produce, say, 1200 CFM, but your ductwork can only handle 800 CFM efficiently, you’ve got a bottleneck. The system is working harder than it needs to, struggling to push air through restrictive passages, and the result is uneven temperatures, wasted energy, and reduced comfort.
Every ton of cooling capacity, as a general rule, typically requires around 400 CFM of airflow. So, a 3-ton AC unit would ideally need about 1200 CFM to operate correctly. This isn’t a hard and fast rule for every scenario, but it gives you a baseline. When the CFM is off, your system can’t remove humidity effectively, your coils might freeze up, or your furnace could overheat. It’s a fundamental parameter that, when ignored, leads to a cascade of problems. Proper CFM ensures that your system can breathe, distributing conditioned air evenly and maintaining the desired temperature without excessive effort.
Why Accurate CFM is Crucial for Ductwork Performance
The ductwork in your home or business isn’t just a series of metal or flex tubes; it’s the circulatory system of your HVAC unit. Just like your body’s circulatory system needs to move blood efficiently to every part, your ductwork needs to move conditioned air efficiently to every room. Accurate CFM calculation and delivery are at the core of making that happen.
First off, let’s talk about comfort. If you’ve ever been in a home where some rooms are too hot and others are too cold, even with the thermostat set, you’ve likely experienced the effects of incorrect CFM. Inadequate airflow means some areas aren’t getting enough conditioned air, while others might be getting too much, leading to hot or cold spots. It’s not just about total CFM, but about balanced CFM delivery to each zone.
Next up is energy efficiency. When your ductwork can’t handle the CFM your unit is designed to produce, the system has to work harder. The fan motor runs longer, or at higher speeds, to try and push air through undersized or leaky ducts. This extra work translates directly into higher energy bills. Conversely, if your ducts are oversized, air velocity can drop too low, leading to poor mixing and temperature stratification. The goal is the sweet spot where the right amount of air moves at the right speed.
Then there’s the lifespan of your equipment. An HVAC system constantly struggling with improper airflow is under immense stress. Motors can burn out prematurely, compressors can fail, and heat exchangers can crack. This isn’t just theory; I’ve seen countless units on their last legs years before their time, all because the ductwork setup was a mess. Ensuring proper CFM protects your significant investment in an HVAC system by allowing it to operate as intended.
Finally, consider indoor air quality. Proper airflow helps circulate and filter air effectively. If air isn’t moving through the system correctly, airborne pollutants, dust, and allergens can accumulate. Poor airflow can also contribute to humidity problems, which in turn can lead to mold and mildew growth. So, getting the CFM right isn’t just about temperature; it’s about the very air you breathe.
In short, accurate CFM isn’t a luxury; it’s a necessity for any HVAC system to provide consistent comfort, operate efficiently, and enjoy a long, healthy life. It’s a fundamental component of a truly effective system.
Understanding the CFM Chart: How to Read & Interpret It
A CFM chart, often called a duct friction chart or a ductulator, is a critical tool for HVAC professionals. It helps us determine the appropriate size of ductwork needed to deliver a specific volume of air (CFM) efficiently, without excessive pressure loss or noise. While it might look intimidating at first glance, it’s essentially a calculator for airflow dynamics.
The Basics of a CFM Chart
Most CFM charts relate four key variables:
- CFM (Cubic Feet per Minute): The volume of air you need to move.
- Duct Size (Diameter or Dimensions): The physical dimensions of the duct (e.g., 8-inch round, 12×8-inch rectangular).
- Air Velocity (Feet per Minute – FPM): How fast the air is moving through the duct.
- Friction Loss (Inches of Water Gauge per 100 feet – in. w.g./100 ft): The resistance the air encounters as it moves through the ductwork. This is a measure of static pressure drop.
The goal is to find a balance. You want to move enough air (CFM) at a reasonable speed (velocity) through a duct of appropriate size, all while minimizing friction loss. Too much friction loss means your fan has to work harder, increasing noise and energy consumption.
How to Interpret a Chart (Simplified)
Imagine a typical duct friction chart. You’ll often see curved lines representing various friction loss rates, intersecting with straight lines for duct diameters and others for CFM and velocity.
- Start with your target CFM: Based on your system’s requirements (e.g., 400 CFM per ton for cooling, or calculated room-by-room needs), you’ll locate this value on the chart.
- Consider acceptable friction loss: For residential systems, a common design friction rate is around 0.08 to 0.10 inches of water gauge per 100 feet of ductwork. Commercial systems might go higher. This is a crucial engineering decision. You’ll find this line on the chart.
- Find the intersection: By aligning your target CFM with your desired friction loss, you can then read off the appropriate duct diameter or rectangular dimensions and the corresponding air velocity.
For example, if you need to move 400 CFM and you’re aiming for a friction loss of 0.1 in. w.g./100 ft, the chart might tell you that an 8-inch round duct would work, resulting in an air velocity of around 1100-1200 FPM. If you chose a smaller, 6-inch duct for the same CFM, your friction loss would skyrocket, and your velocity would become excessively high, leading to noise and inefficiency. If you chose a larger, 10-inch duct, your friction loss would drop, but so would your velocity, potentially making the duct too bulky and perhaps even less effective at delivering air to the far reaches of the system without proper balancing.
These charts also account for different duct materials (smooth metal versus flexible duct) and shapes (round versus rectangular), as these factors significantly affect friction loss. A long run of rough, flexible ducting will have much higher friction loss than a shorter run of smooth, rigid sheet metal duct of the same nominal size. That’s why you often hear us advocating for rigid ductwork where possible and keeping flexible ac lines to a minimum, and when used, ensuring they are properly stretched and supported to maintain their cross-sectional area.
Reading these charts isn’t just about plugging in numbers; it’s about understanding the compromises and trade-offs. A good HVAC technician uses these charts as a guide, combined with practical experience, to design a system that works, fits, and performs efficiently for years to come. It’s more art than science at times, but the charts give us the foundational data.
Factors Influencing Your Ductwork’s CFM Requirements
Determining the right CFM for your HVAC system and, consequently, your ductwork isn’t a simple one-size-fits-all equation. A lot of variables come into play, and ignoring any of them can throw your whole system off balance. When I’m evaluating a home or a small commercial space, I consider a whole host of factors to get those numbers right.
Here are the primary influences on your ductwork’s CFM requirements:
Square Footage and Ceiling Height
This is usually the first thing we look at. A larger area, naturally, requires more air to heat or cool. But it’s not just the floor plan; the ceiling height matters too. A room with 10-foot ceilings has more air volume than the same square footage with 8-foot ceilings, and that extra volume needs to be conditioned. That’s why a simple CFM-per-square-foot rule is often just a starting point; actual cubic footage is more precise.
Climate Zone
The local climate plays a huge role. A house in Phoenix needs a much more robust cooling capacity and therefore higher CFM for its AC system than a similar house in Seattle, where cooling demands are less intense. The same goes for heating in colder climates. Your system’s CFM needs to be powerful enough to overcome the maximum heat gain or loss for your specific region.
Insulation Quality and Window Efficiency
This is a big one for energy loss. A well-insulated home with modern, energy-efficient windows will retain conditioned air much better than an older, poorly insulated structure with single-pane windows. Better insulation means less heat transfer in or out, which reduces the overall load on your HVAC system, potentially lowering the required CFM for the same level of comfort. I’ve seen homeowners save significant money on their utility bills just by upgrading their insulation and windows, allowing their existing, properly sized system to work less.
Number of Occupants and Internal Heat Sources
People generate heat. The more people regularly occupying a space, the more heat they contribute, and the more CFM is needed for cooling. Similarly, internal heat sources like large televisions, computers, kitchen appliances (especially ovens and stovetops), and even bright lighting can add to the heat load. These need to be factored into the cooling CFM requirements. For heating, these internal gains can actually reduce the required heating CFM slightly.
Building Orientation and Shading
The direction your home faces and the amount of shade it gets can have a surprising impact. A house with large, west-facing windows that get direct afternoon sun will have a higher cooling load than a house with the same window area facing north or shaded by trees. This external heat gain directly impacts how much cool air needs to be delivered.
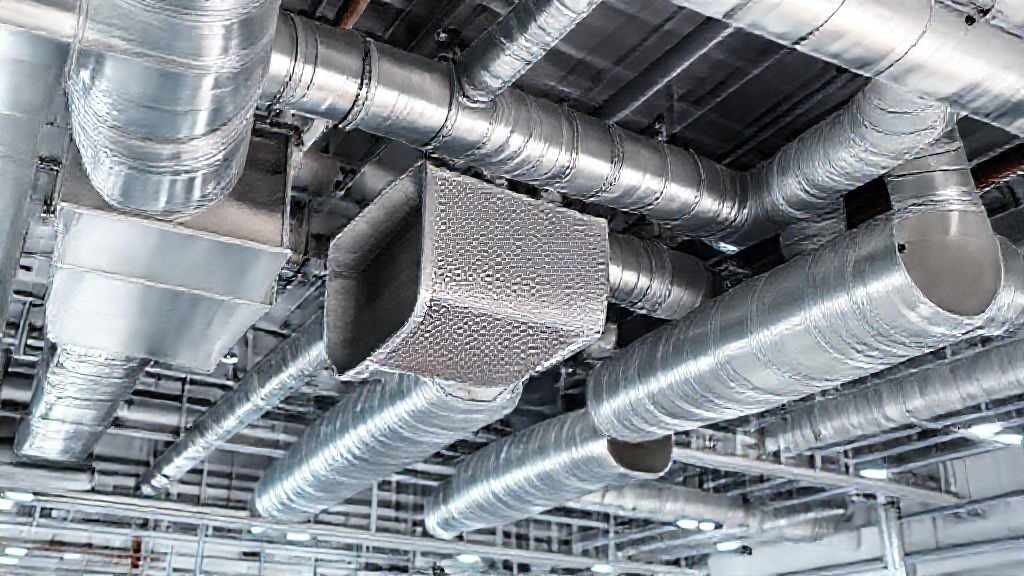
Ductwork Material, Shape, and Length
This directly relates to friction loss, which we discussed with CFM charts. Smooth, rigid metal ducts generally allow for better airflow and lower friction loss than flexible ducts, which can be prone to kinks and sag. Rectangular ducts behave differently from round ducts. Long duct runs with many turns, elbows, and transitions will create more resistance and require a more carefully designed system to maintain target CFM at the registers.
Air Infiltration and Exfiltration
How leaky is your house? Cracks around windows, doors, and penetrations in the building envelope allow unconditioned outside air to leak in (infiltration) and conditioned inside air to leak out (exfiltration). This constant exchange means your HVAC system has to work harder to maintain temperature, effectively increasing the “load” and, therefore, the necessary CFM. A tighter home requires less CFM to condition.
Considering all these factors requires a detailed load calculation, often using industry-standard methods like ACCA Manual J. This isn’t something you can eyeball. Skipping these steps is how you end up with an HVAC system that underperforms or wastes energy, even if the unit itself is high-quality. Getting these factors right at the design stage is fundamental to a long-lasting, efficient system.
Calculating Required CFM for Your Home or Business
Calculating the exact CFM needed for your home or business is where the rubber meets the road. It’s not just about picking a number; it’s about making sure your HVAC system can effectively heat and cool every part of your space. While there are some rough rules of thumb, for accurate sizing, a more detailed approach is always best.
The Rule of Thumb (and why it’s not always enough)
A common starting point you might hear is about 1 CFM per square foot of living space. So, if you have a 2,000 square foot home, you might think you need 2,000 CFM. While this can provide a very rough estimate for a quick glance, it’s far too simplistic for actual design. It doesn’t account for ceiling height, climate, insulation, windows, or any of the other factors we just talked about. Using this rule alone can easily lead to an undersized or oversized system, resulting in discomfort and wasted energy.
The Professional Approach: ACCA Manual J Load Calculation
The industry standard for calculating heating and cooling loads, and by extension, the CFM requirements, is the ACCA Manual J Residential Load Calculation. This is a comprehensive, room-by-room analysis that considers all the variables:
- Geographic Location: To determine outdoor design temperatures and humidity.
- Building Materials: Wall types, roof construction, R-values of insulation.
- Window and Door Specifications: Size, type (single, double, triple pane), U-factor, Solar Heat Gain Coefficient (SHGC), and orientation.
- Infiltration and Ventilation: How much outside air leaks in or is purposefully brought in.
- Internal Heat Gains: Number of occupants, heat from lights and appliances.
- Ductwork Location: Whether ducts are in conditioned or unconditioned spaces (e.g., attic).
- Ceiling Heights and Room Dimensions: Accurate cubic footage for each space.
Once Manual J provides the heat gain (for cooling) and heat loss (for heating) for each room and for the entire house, we then use these figures to determine the required CFM. Generally, for cooling, we aim for approximately 400 CFM per ton of cooling capacity. So, if Manual J indicates a need for a 3-ton AC unit, we’re looking at a target of around 1200 CFM total. However, the true value lies in how that total CFM is then broken down and distributed to each individual room.
Room-by-Room CFM Distribution (Manual D)
After Manual J determines the overall load and the required CFM for the whole house, the next step is ACCA Manual D Duct Design. This is where we allocate the correct CFM to each supply register based on the individual room’s heating and cooling load. For example, a south-facing bedroom with large windows will likely need more CFM for cooling than a north-facing utility room of the same size. This meticulous distribution ensures balanced comfort throughout the entire home.
Manual D also involves:
- Duct Sizing: Using CFM charts (like we discussed) to determine the appropriate diameter or dimensions for each trunk line, branch duct, and return air duct.
- Air Velocities: Ensuring air moves at optimal speeds to prevent noise and excessive friction loss.
- Static Pressure: Calculating the total external static pressure (TESP) the fan needs to overcome, which helps in selecting the right blower motor.
- Return Air Pathways: Ensuring there are adequate pathways for air to return to the furnace or air handler. Often, people focus only on supply, but return air is just as critical.
It’s a detailed process that considers every elbow, every transition, and every foot of ductwork. This level of detail is why a trained professional is necessary. Without it, you’re just guessing, and in HVAC, guessing usually costs you comfort and money in the long run. If you’re considering a new system or looking to address persistent comfort issues, always ask your HVAC contractor about their Manual J and Manual D calculations. It’s the mark of a professional approach to ensure you get the best hvac system for your needs.
Common Mistakes in Duct Sizing and Airflow Management
Over the years, I’ve seen a lot of shortcuts and mistakes when it comes to ductwork and airflow. It’s often where system problems originate, even when the actual furnace or AC unit is functioning perfectly. Avoiding these common pitfalls is crucial for ensuring your HVAC system delivers comfort and efficiency as it should.
1. Undersized or Oversized Ducts
This is probably the most frequent error.
Undersized ducts: If your ducts are too small for the amount of air your system needs to move, the air velocity will be too high. This creates excessive static pressure, forcing your fan motor to work harder, increasing energy consumption, and leading to noisy airflow (whistling or roaring sounds). It also reduces the overall CFM delivered, leading to uneven temperatures and reduced system capacity.
Oversized ducts: While seemingly less problematic, oversized ducts can also cause issues. The air velocity becomes too low, which can lead to poor air mixing, temperature stratification, and potentially reduced heating or cooling effectiveness. It also means you’re paying for more sheet metal or duct material than necessary, and they can be harder to install in tight spaces.
2. Leaky Ductwork
I can’t stress this enough: leaky ducts are energy vampires. Studies have shown that up to 30% of conditioned air can be lost through leaks, cracks, and poorly sealed connections in ductwork, especially if those ducts run through unconditioned spaces like attics, crawl spaces, or basements. This means you’re literally paying to heat or cool your attic instead of your living room. Leaks lead to higher energy bills, reduced comfort, and make your HVAC system work much harder than it should. Properly sealing ducts with mastic or foil tape (never duct tape!) is one of the most cost-effective upgrades you can make.
3. Improperly Balanced Systems
Even if your total CFM is correct, if it’s not distributed properly to each room, you’ll have hot and cold spots. An improperly balanced system might dump too much air into one room and starve another. This often happens when zones aren’t considered, or when adjustable dampers aren’t set correctly (or aren’t present at all). Balancing a system involves adjusting dampers at each register or in the duct runs to ensure each room receives its calculated CFM.
4. Ignoring Return Air Pathways
Many homeowners and even some less experienced installers focus heavily on supply ducts but neglect the return air side. Your system can only push out as much air as it can pull in. If your return air ducts are too small, blocked, or insufficient in number, the system becomes “starved.” This creates negative pressure in the house, can pull in unconditioned air from outside or from unconditioned spaces, and severely restricts overall CFM. Doors undercut by an inch or two, or transfer grilles, are often needed to ensure proper return air pathways in individual rooms, especially bedrooms.
5. Using Flexible Ducting Incorrectly
Flexible ductwork has its place, particularly for short connections, but it’s often misused. When flexible ducts are kinked, squashed, run with too many bends, or aren’t fully stretched, they dramatically increase friction loss and reduce airflow. A 10-inch flexible duct that’s kinked down to 8 inches might perform like a 6-inch duct. This is why proper installation, ensuring it’s fully extended and supported, is critical. Using too much flexible duct where rigid duct would be more appropriate is a common mistake that cripples system performance.
6. Inadequate Filter Maintenance
While not strictly a duct sizing issue, a clogged air filter significantly restricts airflow, effectively reducing the CFM your system can move. It’s like trying to breathe through a thick blanket. This can lead to all the same problems as undersized ducts: increased static pressure, higher energy consumption, and reduced heating or cooling capacity. Replacing or cleaning your filter regularly is a simple, yet profoundly important, maintenance task.
Avoiding these mistakes requires careful planning, accurate calculations, and skilled installation. It’s why relying on a knowledgeable HVAC professional is so important for new installations or major system overhauls. They understand these nuances and how to design a system that works, not just one that fits.
Tips for Optimizing Your Ductwork for Maximum Efficiency
Once you understand the importance of CFM and proper duct sizing, the next step is to optimize your existing or new ductwork for maximum efficiency. It’s not always about replacing everything; sometimes, smart improvements can make a world of difference. Here are some of my top tips:
1. Seal All Duct Leaks
This is often the lowest-hanging fruit and offers the biggest bang for your buck. As I mentioned, leaks are huge energy drains. Get into your attic, crawl space, or basement and meticulously inspect all duct seams, connections, and penetrations. Use mastic sealant or specialized foil-backed tape (UL-181 approved) to seal every gap. Pay particular attention where ducts connect to the furnace or air handler, and where branch ducts meet the main trunk lines. This alone can often improve your system’s efficiency by 10-20%.
2. Insulate Ducts in Unconditioned Spaces
If your ductwork runs through an attic, crawl space, garage, or any other area that isn’t heated or cooled, it’s losing energy. In the summer, hot attic air heats up the cool air in your ducts before it even reaches your living space. In winter, cold attic air cools down your warm air. Insulating these ducts properly with a high R-value insulation significantly reduces this energy transfer. This keeps your conditioned air closer to its target temperature and reduces the load on your HVAC system.
3. Ensure Proper Duct Material and Design
While often a design decision for new construction or major renovations, understanding this is key. Rigid sheet metal ducts generally offer smoother airflow and less friction loss than flexible ducts. Where flexible ductwork is used, ensure it’s fully stretched, free of kinks, and properly supported every few feet to maintain its circular cross-section. Avoid excessive bends or long runs of flexible ducting. A well-designed system prioritizes straight runs and minimizes sharp turns, which create turbulence and static pressure.
4. Address Return Air Limitations
Don’t neglect the “inhale” of your system. Ensure you have adequate return air pathways. This might mean adding a central return grille, installing transfer grilles above doorways in rooms without dedicated returns, or even undercutting interior doors by an inch or so to allow air to flow back to the main return. Without enough return air, your system chokes, reducing overall CFM and creating pressure imbalances.
5. Balance Your System
Even with perfectly sized and sealed ducts, your system might not be balanced. An experienced technician can use specialized tools to measure airflow at each register and adjust dampers in the ductwork to ensure each room receives its appropriate CFM. This balances the system, eliminating hot and cold spots and ensuring consistent comfort throughout your home.
6. Consider Zoning Systems
For larger homes or those with diverse heating/cooling needs (e.g., a two-story house, or rooms with varying sun exposure), a zoning system can be a great investment. This allows you to control the temperature in different areas independently. It involves motorized dampers in the ductwork that open and close based on thermostat calls from different zones. This ensures conditioned air is only sent where and when it’s needed, saving energy and maximizing comfort. However, zoning adds complexity and needs careful design to avoid static pressure issues.
7. Explore Alternatives for Problem Areas
Sometimes, traditional ducted systems just can’t effectively reach or condition certain areas, or extending ducts might be impractical. In these cases, consider supplementary solutions. For instance, a mini split a c unit or split wall air conditioning units can provide targeted heating or cooling to additions, converted garages, or rooms that consistently struggle to reach temperature. These ductless systems are highly efficient and can be a good complement to an existing central system.
Implementing even a few of these tips can significantly improve your system’s performance, extend its lifespan, and put money back in your pocket. It’s all about making sure that valuable conditioned air gets where it needs to go, efficiently and effectively.
When to Consult an HVAC Professional for Ductwork & CFM
While understanding CFM and ductwork basics is beneficial for any homeowner, there are definitive times when you absolutely need to bring in a seasoned HVAC professional. Trying to tackle complex duct design or system diagnosis yourself can often lead to more problems, higher costs, and ongoing discomfort. Believe me, I’ve seen plenty of DIY attempts that ended up costing more to fix than if a professional had been called in from the start.
Here are the key scenarios where professional expertise is not just recommended, but essential:
1. New HVAC System Installation or Replacement
This is non-negotiable. When you’re investing in a new furnace, air conditioner, or heat pump, the accompanying ductwork design and sizing must be perfect. A professional will perform detailed ACCA Manual J and Manual D calculations to ensure the unit is correctly sized and the ductwork can handle the required CFM. They’ll also ensure proper return air, sealing, and insulation. Skipping this step is a recipe for an inefficient system from day one, regardless of how good the new equipment is. If you’re looking into this, please contact us for a quote so we can get it right for you.
2. Major Home Renovations or Additions
If you’re adding rooms, converting a garage, or making significant changes to your home’s layout, your existing ductwork and system capacity will likely need adjustments. A professional can assess the new load, calculate additional CFM requirements, and design extensions or modifications to your duct system to ensure the new spaces are properly conditioned without negatively impacting existing areas.
3. Persistent Comfort Issues or Hot/Cold Spots
If you’re constantly battling rooms that are too hot or too cold, excessive humidity, or inconsistent temperatures throughout your home, it’s a strong indicator of an airflow or ductwork problem. A professional has the tools and expertise to diagnose these issues, which could range from duct leaks and blockages to improper balancing or undersized duct runs. They can perform airflow measurements, static pressure tests, and thermal imaging to pinpoint the exact cause.
4. High Energy Bills Without Explanation
Are your utility bills climbing despite regular maintenance on your HVAC unit? Inefficient ductwork, particularly extensive leaks or poor insulation, could be the culprit. A professional energy audit, which often includes duct testing (like a duct blaster test), can identify exactly how much air is being lost and recommend targeted solutions to improve efficiency.
5. Noisy Ductwork
Whistling, banging, or roaring sounds coming from your ducts are usually signs of trouble. This could indicate excessive air velocity due to undersized ducts, loose connections, or improperly adjusted dampers. A professional can identify the source of the noise and recommend solutions that improve both acoustics and airflow performance.
6. Visible Duct Damage or Deterioration
If you notice rusted, sagging, disconnected, or moldy ductwork, especially in visible areas or during other home inspections, it’s time to call in the experts. Damaged ducts compromise air quality, efficiency, and system performance. They can advise on repair, replacement, or cleaning options.
7. Considering a Zoning System
While beneficial, installing a zoning system requires very careful design to manage static pressure and airflow properly across different zones. This is a complex task that should only be handled by an experienced HVAC contractor to avoid creating new problems.
In essence, whenever you’re dealing with anything beyond basic filter changes or thermostat programming, especially concerning the physical air distribution system, a professional is your best resource. Their expertise ensures your system runs safely, efficiently, and keeps your home comfortable for years to come.
FAQ
Q1: Can I calculate the CFM for my home myself?
A: While you can find simple rules of thumb (like 1 CFM per square foot) online, these are very rough estimates. For accurate sizing and performance, a detailed load calculation (ACCA Manual J) and duct design (ACCA Manual D) are necessary. These complex calculations factor in many variables that a homeowner typically can’t accurately assess. It’s best left to a professional HVAC technician.
Q2: What happens if my ductwork has too low CFM?
A: If your ductwork has too low CFM for your HVAC system, it means the system can’t move enough air. This leads to reduced heating and cooling capacity, uneven temperatures (hot and cold spots), high energy bills because the system runs longer to try and meet demand, potential damage to the equipment (like frozen AC coils or an overheated furnace), and poor indoor air quality due to insufficient air circulation and filtration.
Q3: What’s the difference between static pressure and air velocity?
A: Air velocity is how fast the air is moving through the duct, typically measured in feet per minute (FPM). Static pressure is the resistance the air encounters as it moves through the ductwork and components (coils, filters), measured in inches of water gauge (in. w.g.). High static pressure indicates a lot of resistance, often due to undersized or restrictive ductwork, which makes the fan motor work harder.
Q4: How often should I check my ductwork for leaks?
A: It’s a good idea to have your ductwork inspected for leaks as part of your annual HVAC maintenance, especially if your ducts are in an unconditioned attic or crawl space. If you notice significantly rising energy bills, new hot/cold spots, or excessive dust, you might want to inspect them more frequently or call a professional for a specific duct leakage test.
Q5: Can I add more registers to improve airflow?
A: Adding more registers without professional assessment can sometimes do more harm than good. Each register needs to be supplied by appropriately sized ductwork, and the overall system needs to be able to handle the additional airflow paths. Simply adding registers can unbalance the system, reduce airflow to existing registers, or overload your blower motor. Always consult an HVAC professional before making such modifications.
Q6: Is rigid ductwork always better than flexible ductwork?
A: Generally, rigid metal ductwork offers superior airflow, less friction loss, and greater durability compared to flexible ductwork. However, flexible ducting has its place for short, accessible runs or where rigid ducting is impractical. The key is proper installation: flexible ducts must be fully stretched, supported, and free of kinks or sharp bends to perform optimally. A hybrid system, using rigid for main trunks and flexible for short branches, is often a good compromise.
Final Thoughts
I’ve spent a good chunk of my life dealing with HVAC systems, and if there’s one area that consistently gets overlooked, it’s the ductwork and the crucial role of CFM. People often focus on the shiny new furnace or air conditioner, but the best equipment in the world won’t perform if its arteries and veins – the ducts – are clogged, undersized, or leaky. It’s like putting a powerful engine in a car with a restricted exhaust; you’re just not going to get the performance you paid for.
Understanding CFM charts and the principles of proper duct design isn’t just academic; it’s fundamental to comfort, energy efficiency, and the longevity of your entire HVAC system. Whether you’re building a new home, renovating an existing one, or just trying to solve those nagging hot and cold spots, paying attention to your ductwork’s ability to move air is paramount. Don’t underestimate the impact of well-designed and properly maintained ductwork on your indoor environment.
My advice, as always, is to partner with a qualified and experienced HVAC professional. They have the knowledge, the tools, and the understanding of these complex systems to ensure your home or business receives the right amount of conditioned air, precisely when and where it’s needed. It’s an investment that truly pays off in consistent comfort and lower energy bills, year after year. Don’t settle for less than optimal airflow; your comfort depends on it.