After decades in the HVAC field, I’ve seen just about everything when it comes to heating and cooling systems. One thing that consistently separates a good, efficient system from a struggling, money-wasting one often comes down to the ductwork. Specifically, it’s about understanding and correctly applying the concept of CFM – Cubic Feet Per Minute – to duct sizing.
I remember one job in Tampa, Florida, where a homeowner was absolutely sweltering upstairs, even with a brand new, oversized AC unit. The contractor who installed it had just slapped in the new unit without touching the old ductwork. We traced it all the way back, and it turned out the original ducts, designed for a much smaller, less powerful system, simply couldn’t handle the CFM output of the new unit. It was like trying to force a firehose through a garden hose. The unit was running constantly, battling high static pressure, and still couldn’t deliver the cooled air effectively. Fixing those ducts made all the difference, bringing the upstairs temperature down by nearly 10 degrees and cutting their energy bill significantly. That’s a real-world example of why duct size and CFM aren’t just technical terms; they’re critical to your comfort and your wallet.
Key Highlights
- CFM is Airflow: Cubic Feet Per Minute (CFM) measures the volume of air your HVAC system moves.
- Sizing Matters: Properly sized ducts ensure optimal airflow, comfort, and energy efficiency.
- Efficiency and Lifespan: Incorrect duct sizing leads to higher energy bills, reduced equipment lifespan, and poor indoor comfort.
- Manual D is Key: ACCA Manual D is the industry standard for professional duct design.
- Professional Help: Duct design is complex and best handled by experienced HVAC professionals.
What is CFM (Cubic Feet Per Minute) in HVAC?
Let’s start with the basics. When we talk about CFM in HVAC, we’re talking about airflow. CFM stands for Cubic Feet Per Minute, and it’s a direct measure of the volume of air that your heating and cooling system moves in one minute. Think of it like this: if you have a box that’s one foot long, one foot wide, and one foot high, that’s one cubic foot. If your system is moving 1,000 CFM, it’s pushing 1,000 of those imaginary boxes of air through your ducts every single minute.
This measurement is fundamental because it dictates how much conditioned air—either heated or cooled—actually gets delivered to your living spaces. Your furnace and air conditioner are rated to produce a certain amount of heating or cooling capacity, usually measured in BTUs (British Thermal Units) for heat and tons for cooling. A key part of translating that capacity into actual comfort is ensuring the air carrying that heat or cold can move freely and effectively throughout your home. Without sufficient CFM, even the most powerful unit won’t do its job properly.
Every HVAC system is designed to operate within a specific CFM range to perform efficiently. For example, a typical central air conditioning system aims for about 350 to 450 CFM per ton of cooling capacity. If you have a 3-ton AC unit, you’re looking at a target airflow of around 1,050 to 1,350 CFM. If your ductwork can’t handle that volume of air, or if there’s too much resistance in the system, your actual airflow will be much lower than it should be. This leads to a whole host of problems we’ll discuss shortly.
It’s important to understand that CFM isn’t just about moving air; it’s about moving the right amount of air. Too little, and you won’t get enough heating or cooling. Too much, and you can create uncomfortable drafts and excessive noise, not to mention putting undue strain on your equipment. Correct CFM is the bedrock of a comfortable, efficient HVAC system.
Why Accurate Duct Sizing is Crucial for HVAC Efficiency
Now that we know what CFM is, let’s talk about why getting your duct sizing right is so critical. It’s not an exaggeration to say that proper duct sizing based on CFM is just as important as selecting the right size furnace or air conditioner. You could have the most expensive, high-efficiency equipment installed, but if the ducts aren’t sized correctly, that efficiency goes right out the window. It’s like putting a Ferrari engine in a bicycle frame – it just won’t work as intended.
First and foremost, accurate duct sizing directly impacts your system’s energy efficiency. When ducts are too small for the amount of air the HVAC unit needs to move, the system has to work harder to push air through restricted passages. This creates excessive static pressure, which puts a significant strain on the blower motor. A hardworking motor consumes more electricity, driving up your energy bills. Conversely, if ducts are significantly oversized, the air velocity can drop too low, leading to stratification and uneven temperatures throughout your home, meaning your system runs longer to achieve desired setpoints.
Beyond energy use, proper duct sizing affects your comfort. Undersized ducts lead to insufficient airflow to certain rooms, causing hot or cold spots. You end up with some rooms feeling stuffy and others comfortable, or some too chilly. The system struggles to maintain a consistent temperature throughout the house, making your living environment less enjoyable. On the flip side, ducts that are too large might not deliver air with enough force to properly mix with room air, leading to similar comfort issues.
Then there’s the issue of equipment lifespan. When your HVAC system’s blower motor is constantly battling high static pressure due to undersized ducts, it’s under constant stress. This excessive strain can lead to premature wear and tear on the motor, belts, and other internal components. This means more frequent repairs and potentially an earlier replacement of your entire unit. Proper airflow helps the system operate within its designed parameters, extending its operational life. It also ensures that components like evaporator coils get the correct airflow for efficient heat transfer, preventing freezing or overheating that can damage the system.
Finally, accurate duct sizing contributes to better indoor air quality. When airflow is poor, contaminants can build up in the ductwork or not be filtered effectively. A well-designed duct system ensures that air circulates properly through filters and, if present, through accessories like a whole-house air purifier or a uv light air scrubber. Good airflow helps remove dust, allergens, and other pollutants from your home’s air, creating a healthier living environment for everyone.
Key Factors Influencing Duct Size and Airflow
Designing ductwork isn’t a simple guessing game; it’s a careful calculation that takes several factors into account. To ensure your system can deliver the right CFM to every corner of your home, professionals consider a variety of elements. Here’s a breakdown of the key factors that influence duct size and overall airflow:
System Capacity (Tonnage/BTUs)
This is the starting point. The heating and cooling capacity of your HVAC unit directly determines the total CFM required. As I mentioned, a general rule of thumb for cooling is 350-450 CFM per ton. A larger capacity system needs to move more air, which inherently requires larger or more numerous ducts to avoid restrictions.
Room-by-Room Heat Load Calculations (Manual J)
Before you even think about duct sizing, you need to know how much heating and cooling each individual room needs. This is determined through a detailed calculation called ACCA Manual J. It accounts for factors like window size and type, insulation levels, ceiling height, building materials, orientation to the sun, and even the number of occupants. Knowing each room’s specific heat load allows us to determine the exact CFM required for that space, which then guides the sizing of the supply ducts leading to it.
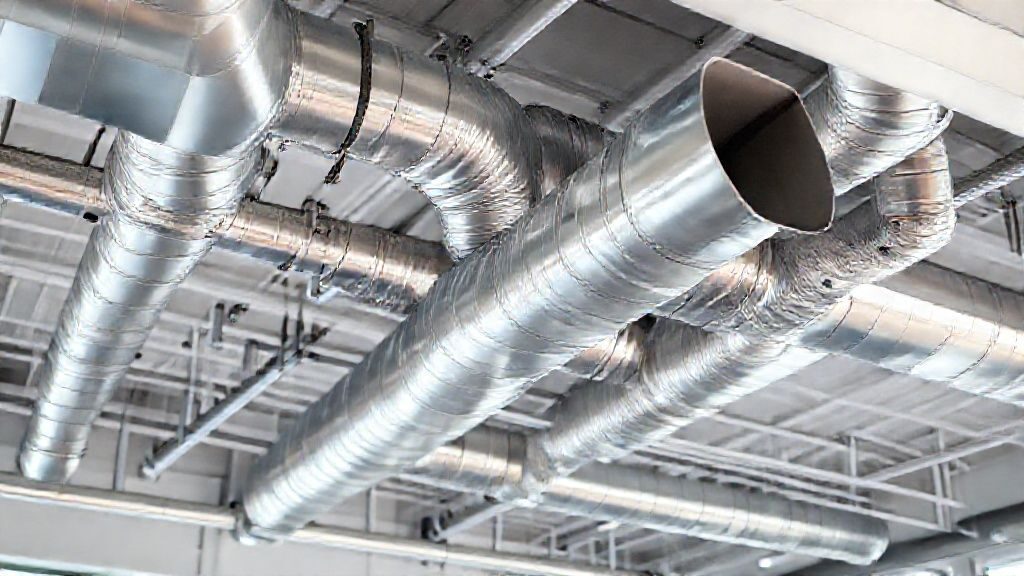
Duct Material
The type of material used for your ducts affects airflow.
- Sheet Metal (Galvanized Steel or Aluminum): These are smooth and offer the least resistance to airflow, allowing for smaller duct sizes compared to other materials for the same CFM. They are durable and long-lasting.
- Fiberboard: Often found in older homes, it offers slightly more resistance than metal but is relatively inexpensive.
- Flexible Ductwork (Flex Duct): This is the most common in residential applications due to its ease of installation and ability to snake around obstacles. However, it creates the most friction loss, especially if it’s kinked, bent sharply, or not fully extended. For the same CFM, flex duct generally needs to be a larger diameter than metal duct. We always try to minimize its use or keep runs as straight and taut as possible.
Duct Shape (Round vs. Rectangular)
Round ducts are generally more efficient for airflow than rectangular ducts. They have less surface area per unit of air moved, which reduces friction. When rectangular ducts are necessary due to space constraints, their aspect ratio (the ratio of width to height) plays a role. Very flat, wide rectangular ducts can increase friction loss.
Length of Duct Runs
The longer the duct run, the more friction the air encounters, and thus the more resistance there is to airflow. Longer runs may require larger duct diameters or higher static pressure settings on the blower to maintain the desired CFM.
Number and Type of Bends and Fittings
Every elbow, tee, reducer, and transition in your ductwork adds resistance. Sharp 90-degree turns cause significantly more friction loss than smooth, gradual bends. A well-designed system minimizes these turns or uses fittings that have lower airflow resistance.
Air Velocity
Air velocity (feet per minute, FPM) is important. Too low a velocity can lead to air stratification and dust settling, especially in return ducts. Too high a velocity can create excessive noise and increased friction loss, requiring more energy from the blower. There are optimal velocity ranges for supply and return ducts, typically around 700-900 FPM for residential supply runs.
Static Pressure
This is the resistance to airflow within the duct system. It’s measured in inches of water column (IWC). Every component in the system – the filter, the coil, the ducts themselves, registers, and grilles – contributes to static pressure. Your HVAC unit’s blower is designed to operate within a specific range of static pressure. Exceeding this range (high static pressure) indicates a restrictive system, meaning air isn’t moving freely. Understanding static pressure is critical for proper duct design and troubleshooting.
Considering all these factors, it becomes clear why duct sizing is a complex engineering task. It’s not something to be estimated by eye or based on old, outdated methods. It requires precise calculations to deliver comfort and efficiency.
How to Calculate CFM Requirements for Your Home
For homeowners, understanding how CFM requirements are calculated can seem daunting, and I’ll be upfront: precise, room-by-room calculations are best left to a qualified HVAC professional. They use specialized software and industry standards. However, I can give you a clear overview of the methodology so you know what goes into it.
The primary goal is to determine the total heating and cooling load for your entire home, and then break that down into individual room loads. This is typically done using the ACCA (Air Conditioning Contractors of America) Manual J Residential Load Calculation. This isn’t a simple square footage estimate; it’s a comprehensive engineering analysis that considers:
- Building Envelope: This includes the amount and type of insulation in your walls, ceilings, and floors.
- Windows and Doors: Their size, type (single, double, triple pane), U-factor, and Solar Heat Gain Coefficient (SHGC) are critical. The direction they face also matters significantly.
- Orientation: Which direction your home faces (north, south, east, west) affects sun exposure and heat gain.
- Air Infiltration: How much outside air leaks into your home through cracks and openings.
- Internal Heat Gains: Heat generated by occupants, lighting, and appliances within the home.
- Duct Leakage: While Manual J calculates the load, duct leakage influences how much conditioned air actually reaches the rooms.
- Local Climate Data: Outdoor design temperatures for your specific region are crucial for accurate calculations.
Once the Manual J calculation determines the total BTUs per hour needed for cooling and heating for each room, we can then translate that into CFM. As a general rule of thumb for cooling, a system requires about 350 to 450 CFM per ton of cooling capacity. Since one ton of cooling is equivalent to 12,000 BTUs per hour, you can estimate your total system CFM by dividing your total cooling BTUs by a factor between 27 and 34 (12,000 BTUs / 450 CFM = ~27, and 12,000 BTUs / 350 CFM = ~34). A 3-ton system, for instance, needing 36,000 BTUs of cooling, would typically require between 1,050 and 1,350 CFM.
However, that’s just the total CFM. The real challenge comes in distributing that CFM accurately to each room. If a bedroom requires 5,000 BTUs of cooling, and we target 400 CFM per ton, that room needs approximately 166 CFM (5000 BTUs / 12000 BTUs per ton * 400 CFM per ton). This room-by-room CFM requirement then dictates the size of the supply and return ducts leading to and from that specific space.
Some people try to use a simple “CFM per square foot” rule (e.g., 1.5-2.0 CFM per square foot for residential). While this can give you a very rough ballpark figure, it’s highly inaccurate because it doesn’t account for any of the critical factors listed above. Two homes of the exact same square footage can have vastly different CFM requirements based on their construction, windows, and insulation. Relying on such a simplistic method is a common mistake that leads to poorly performing systems.
In essence, calculating CFM requirements is a precise process that ensures your HVAC system is matched not only to your home’s total demands but also to the individual needs of each room, guaranteeing balanced airflow and optimal comfort. It’s the first critical step before even touching duct design.
Understanding Duct Sizing Charts and Manual D
Once we have the CFM requirements for each section of your home, the next step is designing the actual ductwork. This is where duct sizing charts and the industry standard, ACCA Manual D, come into play. You might think of it as a blueprint for how air will travel through your home.
ACCA Manual D, short for “Residential Duct Systems,” is the authoritative guide for designing and installing residential ductwork. It’s a comprehensive methodology that ensures ducts are sized correctly to deliver the calculated CFM to each room, while also keeping air velocity and static pressure within acceptable limits. It moves far beyond simple rules of thumb, using specific formulas and charts developed through extensive research.
Duct sizing charts are visual tools, often in the form of a graph or table, that HVAC professionals use in conjunction with Manual D principles. These charts help us determine the appropriate duct dimensions (diameter for round ducts, or width and height for rectangular ducts) based on several key parameters:
- CFM (Cubic Feet Per Minute): This is the primary input, representing the amount of air that needs to pass through a specific section of duct.
- Friction Rate (or Friction Loss): Measured in inches of water column per 100 feet of duct (in.w.c./100 ft). This represents the resistance the air encounters as it moves through the duct. Manual D provides acceptable friction rate ranges for residential systems, usually around 0.08 to 0.10 in.w.c./100 ft. Choosing a specific friction rate is a crucial design decision.
- Air Velocity (Feet Per Minute, FPM): As discussed earlier, velocity needs to be within an optimal range – not too high (to avoid noise and excessive friction) and not too low (to prevent dust settling and stratification). Charts typically show the resulting air velocity for a given CFM and duct size.
Here’s a simplified look at how a professional might use a duct sizing chart:
- First, they calculate the required CFM for a specific room or section of the house using Manual J.
- Then, they select an appropriate friction rate based on the overall system design and the length of the duct run.
- Using the chart, they’ll find the intersection of the required CFM and the chosen friction rate. This intersection will indicate the necessary duct size (e.g., 8-inch round duct or 14×6 inch rectangular duct).
- They also verify that the resulting air velocity falls within acceptable limits for comfort and quiet operation.
It’s not just about one section. Manual D requires this process to be done for every branch of the duct system, from the main trunk lines coming off the air handler down to the smallest individual supply and return ducts. Factors like duct material, shape, and the number of fittings (elbows, reducers) are also accounted for, as each adds “equivalent length” to the duct run, increasing the effective friction. This methodical approach ensures that the entire duct network is balanced and capable of delivering the right amount of air to the right places.
For a homeowner, trying to interpret and apply these charts without formal training is not advisable. There are many variables and considerations that only experience and proper education can navigate. This is precisely why duct design is considered an engineering discipline within HVAC and why relying on an experienced professional for your ductwork ensures a comfortable and efficient system for years to come.
The Consequences of Incorrect Duct Sizing
I’ve seen firsthand what happens when ductwork is sized incorrectly. It’s rarely a minor inconvenience; more often, it leads to a cascade of problems that affect comfort, energy bills, and even the lifespan of your expensive HVAC equipment. Let’s break down the most common consequences:
Under-Sized Ducts
This is probably the most frequent issue I encounter. When ducts are too small for the amount of air your system needs to move, you get:
- High Static Pressure: The blower motor has to push harder against resistance. This is measurable and often exceeds the manufacturer’s recommended operating range for the equipment.
- Reduced Airflow: Despite the blower working harder, less air actually makes it to your rooms. This means insufficient heating or cooling.
- Hot and Cold Spots: Some rooms won’t receive enough conditioned air, leading to noticeable temperature differences across your home. One bedroom might be freezing while another is stuffy and warm.
- Increased Energy Bills: The blower motor, working overtime to overcome resistance, consumes more electricity. Your system runs longer and harder, costing you more money every month.
- Noisy System Operation: High-velocity air being forced through small ducts can create whistling, howling, or whooshing noises, particularly at registers. The blower motor itself might also become louder as it strains.
- Premature Equipment Failure: The constant strain on the blower motor can lead to it overheating and burning out. Other components, like heat exchangers or compressor coils, might also fail prematurely because they aren’t getting the proper airflow for efficient heat transfer. This could lead to expensive repairs or even needing to replace your entire unit sooner than expected.
- Shorter Equipment Lifespan: Your HVAC system is designed to last 15-20 years. An undersized duct system can cut that lifespan by several years, making your investment less valuable in the long run.
Over-Sized Ducts
While less common than undersized ducts, oversized ducts also present their own set of problems:
- Low Air Velocity: The air moves too slowly through the larger ducts. This can lead to inefficient air distribution, as the air struggles to reach the furthest registers with enough force.
- Poor Comfort: Similar to undersized ducts, low velocity can result in uneven temperatures and poor air mixing in rooms.
- Dust Accumulation: If air velocity is too low, dust particles can settle more easily within the ductwork, contributing to poorer indoor air quality and requiring more frequent duct cleaning.
- Increased Heat Loss/Gain: Larger ducts have more surface area. If ducts are uninsulated or poorly insulated and run through unconditioned spaces (attics, crawl spaces), this larger surface area means more opportunity for heat to escape in winter or enter in summer, wasting energy.
- Higher Installation Costs: Larger ducts require more material and space, which can drive up initial installation costs unnecessarily.
Both scenarios lead to a system that doesn’t perform as it should, costs more to run, and wears out faster. It’s a classic example of how a seemingly technical detail, like duct sizing, has a profound impact on your everyday comfort and financial outlay. Sometimes, when faced with persistent issues, homeowners might even consider alternative systems, though it’s important to understand the how much for mini split installation cost before deciding to scrap a ducted system. But often, the problem isn’t the system itself, but the ducts it’s connected to. Making sure your entire home’s air distribution system is correctly designed is key to getting the most out of all your home air products.
When to Consult an HVAC Professional for Ductwork
Given the complexity of duct sizing and the significant consequences of getting it wrong, knowing when to call in a professional is key. While some minor issues like replacing a single flex duct run might seem like a DIY task, anything beyond that really needs expert attention. Here are the situations where you absolutely should consult an experienced HVAC professional for your ductwork:
New HVAC System Installation
This is the most critical time. Anytime you’re installing a new furnace, air conditioner, or heat pump, the ductwork should be evaluated and, if necessary, redesigned. Even if your old ducts “worked fine” with an older, less powerful unit, they might not be appropriate for a modern, higher-efficiency system. A new system needs new calculations to match its capacity and airflow requirements. Never let a contractor install a new system without performing a Manual J load calculation and a Manual D duct design.
Significant Home Renovations or Additions
If you’re adding rooms, converting a garage, finishing a basement, or making any substantial changes to your home’s layout or size, your existing ductwork will almost certainly need modification. Expanding your conditioned space means more heating and cooling load, which directly translates to needing more CFM delivered to those new areas. Simply extending existing ducts often leads to problems in both the new and old spaces.
Persistent Comfort Issues
Are you constantly battling hot or cold spots in certain rooms? Is one floor always too warm or too cool? Do you have excessive humidity in some areas? These are classic signs of unbalanced or improperly sized ductwork. A professional can diagnose these issues, measure static pressure and airflow, and recommend targeted solutions.
High Energy Bills with No Obvious Cause
If your energy bills are unexpectedly high, and your HVAC system seems to be running constantly without achieving desired temperatures, poor ductwork could be the culprit. An overworked blower motor due to restrictive ducts uses more electricity. An HVAC technician can perform diagnostics to see if high static pressure is draining your wallet.
Visible Signs of Duct Damage or Deterioration
Any visible damage like crushed flexible ducts, disconnected joints, excessive condensation on ducts in unconditioned spaces, or heavily corroded metal ducts warrant professional inspection. While not always a sizing issue, these problems certainly impact airflow and efficiency. A pro can assess the damage and determine if repairs or replacements are needed.
Excessive System Noise
If your registers are whistling, your air handler is roaring, or you hear loud rushing air through the vents, it often points to airflow restrictions caused by undersized ducts or improper damper settings. A professional can identify the source of the noise and recommend solutions.
Replacing or Upgrading Your Air Filter Frequently
While often a sign of dirty air, it can also point to high static pressure if your blower is struggling to pull air through a clean, appropriate filter. This often means your ducts are too restrictive.
In all these scenarios, attempting to troubleshoot or fix duct issues yourself without proper tools, knowledge, and experience can often lead to more problems. HVAC professionals have the diagnostic equipment to measure airflow and static pressure, the training to interpret those readings, and the expertise to apply Manual J and Manual D principles for effective solutions. When you’re dealing with something as integral to your home’s comfort and efficiency as the ductwork, it’s always worth it to seek out a reliable expert. If you’re considering a project or have concerns, feel free to contact us for a quote. Finding the best HVAC service means getting the job done right the first time, especially when it comes to ducts.
FAQ
Q1: How do I know if my ducts are the right size?
A: The most common indicators of incorrect duct sizing are persistent hot or cold spots in certain rooms, unusually high energy bills, a noisy system (whistling at registers or a straining blower), and an HVAC system that cycles on and off too frequently or runs constantly without reaching the thermostat setting. A professional HVAC technician can perform an airflow and static pressure test, which directly measures if your ductwork is properly sized for your system.
Q2: Can I resize my ducts myself?
A: For minor issues, like re-taping a disconnected joint or replacing a small section of flexible duct, a handy homeowner might be able to make repairs. However, fundamentally resizing or redesigning ductwork is a complex task that requires specialized knowledge of Manual J load calculations and Manual D duct design principles. Incorrect DIY resizing can worsen airflow, damage your HVAC equipment, and lead to significant energy waste. It’s highly recommended to consult a professional for any significant duct modifications.
Q3: Does duct material matter for CFM?
A: Yes, absolutely. Different duct materials offer varying levels of resistance to airflow. Smooth materials like galvanized sheet metal have the least friction loss, allowing more CFM for a given duct size. Flexible ductwork, while convenient for installation, has higher friction loss, especially if it’s kinked or not fully extended. This means that for the same CFM, you might need a larger diameter flex duct compared to a metal duct. The material is always a factor in professional duct sizing calculations.
Q4: What’s the ideal air velocity in ducts?
A: Ideal air velocity varies slightly between supply and return ducts, and depends on the specific section of the ductwork (main trunk vs. branch). Generally, for residential supply ducts, an optimal velocity range is between 700 to 900 Feet Per Minute (FPM). For return ducts, it might be slightly lower, around 500-700 FPM. Velocities too low can lead to dust settling and poor air mixing, while velocities too high can create excessive noise and increase friction loss, straining the blower motor.
Q5: How often should I have my ducts inspected?
A: It’s a good practice to have your ducts inspected every 3-5 years, or whenever you have your HVAC system serviced, particularly if you’re experiencing any of the issues mentioned above (comfort problems, high bills, noise). If you’re installing a new HVAC system or undertaking major renovations, a thorough duct inspection and potential redesign should be part of the project.
Final Thoughts
Proper duct sizing, driven by accurate CFM calculations, is not just a technical detail; it’s the backbone of an efficient, comfortable, and long-lasting HVAC system. I’ve spent enough years in this business to see the clear difference it makes. A system with correctly designed and installed ductwork will deliver consistent temperatures throughout your home, operate quietly, keep your energy bills in check, and significantly extend the life of your heating and cooling equipment. On the flip side, a poorly designed duct system will fight you every step of the way, leaving you uncomfortable and costing you money.
My advice to any homeowner is simple: never underestimate the importance of your ductwork. When considering a new HVAC installation or addressing persistent comfort issues, always insist on a comprehensive load calculation (Manual J) and a detailed duct design (Manual D) from a qualified professional. It’s an investment that pays dividends in comfort, efficiency, and peace of mind. Don’t let anyone tell you it’s an unnecessary step. It’s fundamental to getting the performance you expect and deserve from your home’s heating and cooling system.