
Most homeowners are surprised to learn that indoor air is 2-5x more polluted than the air outside. Allergens, dust, mold spores, and chemical contaminants accumulate in enclosed spaces, and your HVAC system is either your best defense or an active contributor to the problem. The strategies to improve home air quality through your HVAC system are specific, sequential, and largely within reach for any homeowner willing to move past basic filter changes. This guide covers filtration selection, ventilation upgrades, humidity control, maintenance schedules, and how to verify that your efforts are actually working.
Table of Contents
- Key takeaways
- Improve home air quality: HVAC filtration options
- Ventilation and air leak sealing
- Humidity control and moisture management
- Routine HVAC maintenance for sustained air quality
- Monitoring and verifying air quality improvements
- My perspective on filtration upgrades and system limits
- Upgrade your home’s air quality with Hvac
- FAQ
Key takeaways
| Point | Details |
|---|---|
| Match filters to your system | Upgrading to high MERV filters without checking system compatibility risks blower damage and reduced airflow. |
| Seal ducts before upgrading filters | Leaky ductwork causes 20-30% conditioned air loss and introduces allergens, making duct sealing a higher-impact fix than filtration alone. |
| Hold humidity between 30-50% | Keeping indoor humidity in this range prevents mold growth in ducts and living spaces year-round. |
| Schedule twice-yearly professional tune-ups | Coil cleaning, drain clearing, and system checks twice per year sustain both air quality and equipment longevity. |
| Supplement with sized air purifiers | Portable air purifiers sized for adequate air changes per hour fill gaps that central HVAC systems cannot cover. |
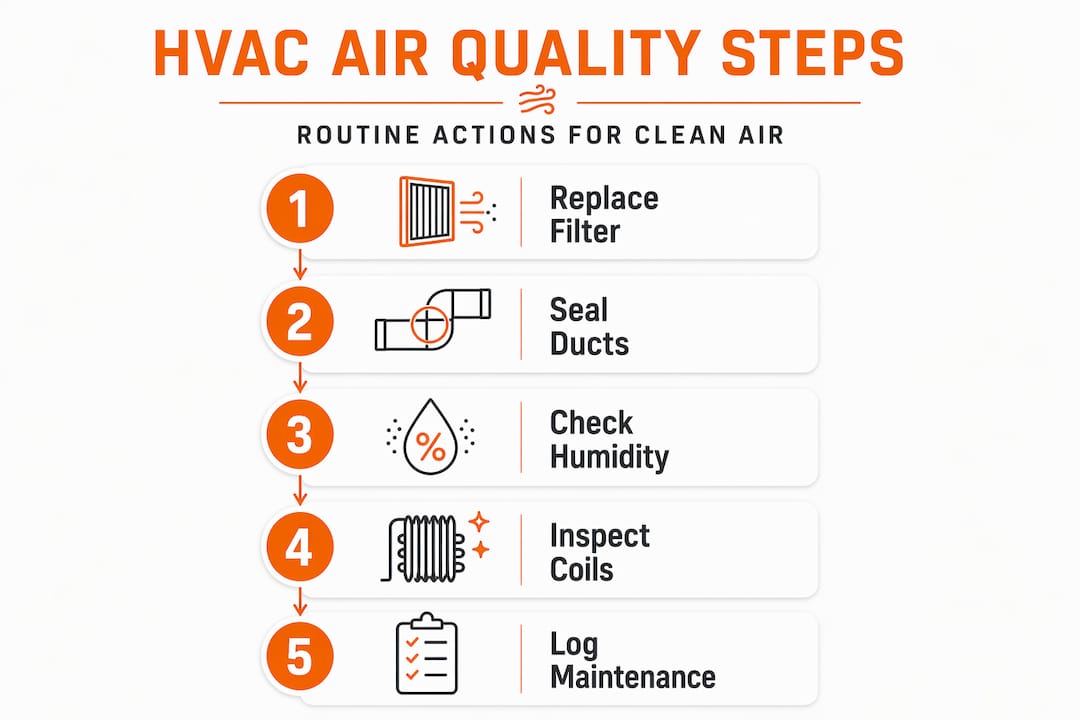
Improve home air quality: HVAC filtration options
Your air filter is the first line of defense in any HVAC air quality solution, but selecting the wrong filter can cause more harm than good. The MERV (Minimum Efficiency Reporting Value) rating system defines what a filter captures, and the differences between rating tiers are significant.
| MERV Rating | Particles Captured | Typical Application |
|---|---|---|
| MERV 8 | Dust, pollen, mold spores (10+ microns) | Standard residential use |
| MERV 11 | Pet dander, fine dust, auto emissions (1-3 microns) | Homes with pets or mild allergies |
| MERV 13 | Bacteria, smoke, fine particulates (0.3-1 micron) | Allergy or asthma households |
| True HEPA | 99.97% of particles at 0.3 microns | Standalone air purifiers |
The jump from MERV 8 to MERV 13 is not always an upgrade. High MERV filters increase static pressure, which forces the blower motor to work harder. In systems not rated for that resistance, this leads to reduced airflow, increased energy consumption, and accelerated component wear. Installing MERV 13 or higher in an incompatible system can also void the manufacturer warranty.
True HEPA filtration captures particles at a level no MERV-rated central filter can match, but HEPA filters are designed for standalone air purifiers, not for most residential duct systems. The resistance they create would restrict airflow to the point of system failure in a standard central air unit.
Key filter selection considerations:
- Confirm your HVAC system’s maximum MERV rating in the owner’s manual before purchasing any filter above MERV 8
- For homes with pets or seasonal allergies, MERV 11 typically offers the best balance of filtration and airflow compatibility
- When shopping for portable purifiers, look for units labeled “True HEPA” rather than “HEPA-type” or “HEPA-like,” as only certified True HEPA units meet the 99.97% capture standard
- In high-pollen seasons or homes with multiple pets, replace filters every 30-60 days regardless of the stated filter lifespan
Pro Tip: Before upgrading your filter rating, check the manufacturer’s specifications for your specific air handler or furnace model. A filter that works perfectly in one system can damage another with identical dimensions.
Ventilation and air leak sealing
Filtration improvements deliver limited results when conditioned air is escaping through leaky ducts, windows, and door frames. Duct leaks cause 20-30% conditioned air loss and simultaneously pull unfiltered air from attics and crawlspaces directly into your living areas, introducing moisture, insulation particles, and allergens that bypass your filter entirely.
Addressing ventilation and sealing is one of the highest-impact steps you can take to improve ventilation systems and reduce pollutant infiltration. Here is a practical sequence to follow:
- Conduct a visual duct inspection. Check accessible ductwork in attics, basements, and utility closets for disconnected joints, gaps at registers, and visible tears in duct insulation.
- Perform a pressure test. A licensed HVAC technician can run a duct blower test to quantify leakage rates and identify problem zones that are not visible.
- Seal with mastic sealant or metal tape. Mastic sealant is preferred for most joints. Standard duct tape degrades quickly under temperature cycling and should not be used on ductwork.
- Address building envelope leaks. Seal gaps around windows, doors, and penetrations with appropriate weatherstripping and caulk to reduce uncontrolled air infiltration.
- Install an Energy Recovery Ventilator (ERV) if your home is tightly sealed. ERVs introduce fresh outdoor air continuously while recovering energy from exhaust air, maintaining air quality without the energy penalty of simply opening windows.
Homes that have been air-sealed without adding mechanical ventilation can develop elevated concentrations of indoor pollutants. The goal is balanced ventilation: controlled fresh air intake with filtered exhaust, not an airtight box. Smart home integrations, including CO2 sensors and connected HVAC controllers, can automate ventilation rates based on occupancy and air quality readings. For a technical reference on airflow calculations for your ducts, Hvac provides detailed CFM charts that help verify your system is moving the right volume of air after sealing work is complete.
Pro Tip: After sealing ducts, recheck your system’s static pressure. Sealing alone can change airflow dynamics, and a quick pressure measurement confirms your blower is operating within its rated range.
Humidity control and moisture management
Humidity is one of the most underestimated variables in better indoor air health. The recommended indoor humidity range is 30-50% relative humidity, and staying within that band prevents the two most common moisture-related air quality problems: mold growth and dust mite proliferation.
When humidity climbs above 50%, mold growth accelerates in duct interiors, on evaporator coils, and in wall cavities. Mold spores then circulate through the same air distribution system that is supposed to be cleaning your air. Below 30%, the air becomes dry enough to irritate respiratory passages and increase susceptibility to airborne viruses.
Your HVAC system manages humidity through several mechanisms:
- Cooling mode: The evaporator coil removes moisture from air as a byproduct of cooling. An oversized air conditioner that short-cycles will cool the air quickly but not run long enough to adequately dehumidify.
- Whole-home dehumidifiers: These units integrate directly into the duct system and operate independently of the cooling cycle, providing dehumidification in shoulder seasons when the AC is not running.
- Heat pumps: Modern heat pumps offer precise humidity management in both heating and cooling modes, making them a strong choice for homes in humid climates.
Additional moisture control measures worth implementing:
- Run exhaust fans in bathrooms for at least 20 minutes after showering
- Confirm that condensate drain lines on air handlers are clear and draining properly
- Check crawlspace vapor barriers annually if your home has an unconditioned crawlspace
- Monitor indoor humidity with a digital hygrometer, available for under $20 at most hardware stores
Pro Tip: At the start of each cooling season, inspect your evaporator coil and drain pan for standing water or biological growth. Catching this early prevents mold from entering your air distribution system before the high-use months begin.
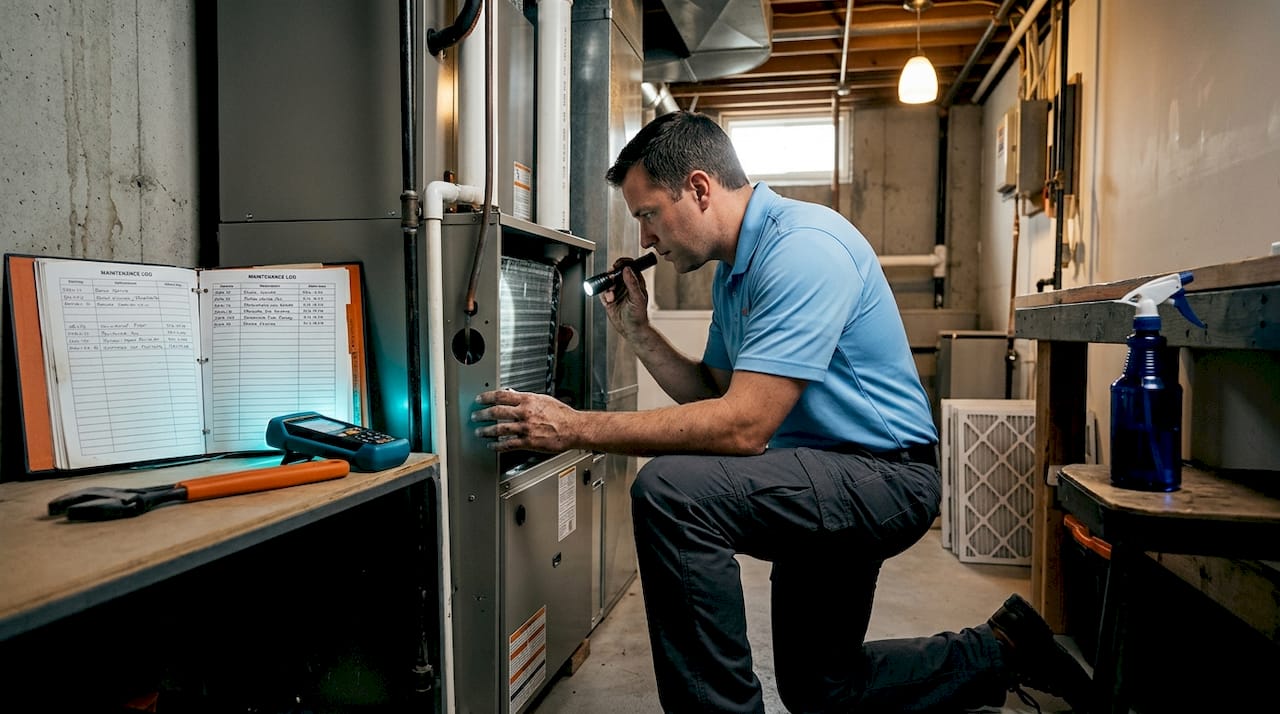
Routine HVAC maintenance for sustained air quality
Filtration and ventilation upgrades lose their effectiveness without consistent maintenance. Professional coil cleaning, drain clearing, and twice-yearly tune-ups are the structural backbone of any long-term air quality strategy. Improving air quality is a systemic, year-round effort that requires consistent HVAC maintenance combined with strategic filtration and ventilation.
A practical maintenance schedule for homeowners:
- Monthly: Inspect the air filter and replace it if it shows visible loading. In homes with pets or high pollen exposure, this will often mean replacement rather than just inspection.
- Quarterly: Check supply and return registers for dust buildup. Wipe down register covers and verify that furniture or rugs are not blocking airflow.
- Spring (pre-cooling season): Schedule a professional tune-up covering evaporator coil cleaning, refrigerant check, drain pan and condensate line clearing, and blower wheel inspection.
- Fall (pre-heating season): Schedule a second tune-up focused on heat exchanger inspection, burner cleaning (for gas systems), and duct integrity verification.
Warning signs that indicate air quality or system performance is degrading:
- Increased dust accumulation on surfaces shortly after cleaning
- Musty or chemical odors when the system first starts
- Worsening allergy or asthma symptoms among household members
- Higher-than-expected energy bills without a change in usage patterns
- Visible mold near registers or on the air handler cabinet
Duct cleaning is a separate service from routine maintenance and is warranted when there is confirmed mold growth, pest infestation, or visible debris accumulation inside ducts. Routine duct cleaning without these indicators offers limited benefit and is not a substitute for the maintenance actions listed above.
Pro Tip: Keep a simple maintenance log with filter replacement dates, service visit summaries, and any symptoms you notice. This record becomes invaluable when diagnosing recurring air quality issues or discussing system history with a technician.
Monitoring and verifying air quality improvements
Implementing key air quality upgrades without measuring outcomes leaves you guessing about effectiveness. Several practical tools and methods allow you to verify that your HVAC air quality solutions are delivering results.
Monitoring options by category:
- Particulate monitors: Devices like the Airthings View Plus or IQAir AirVisual Pro measure PM2.5, PM10, CO2, VOCs, and humidity in real time. These give you a baseline before upgrades and quantifiable data afterward.
- Symptom tracking: Reductions in allergy symptoms, fewer asthma episodes, and improved sleep quality among household members are reliable qualitative indicators of improved air quality.
- Energy bill analysis: After sealing ducts and optimizing filtration, a measurable reduction in heating and cooling costs confirms that airflow efficiency has improved. This connects home energy efficiency tips directly to air quality work.
- Smart HVAC integrations: Connected thermostats and smart home HVAC systems can log runtime data, humidity trends, and filter life, providing ongoing visibility into system performance.
When portable air purifiers are needed to supplement central HVAC, proper sizing is critical. Air purifiers should achieve 4-5 air changes per hour for the room volume they serve, and for allergy or asthma sufferers, units rated 1.5 times the room’s square footage typically deliver adequate performance at quieter fan speeds. For homes with pets, Hvac’s guide on HVAC optimization for pet owners covers supplementary purifier placement and filter upgrade strategies in detail.
Pro Tip: Take an indoor air quality reading before and after each major upgrade, such as duct sealing or a filter change, so you can attribute specific improvements to specific actions. This prevents spending money on changes that don’t move the needle in your specific home.
My perspective on filtration upgrades and system limits
I’ve worked with enough homeowners to know that the most common mistake in this space is treating air quality as a product problem rather than a system problem. Someone reads that MERV 13 filters capture more particles, buys a pack, and installs them in a system rated for MERV 8. Six months later, the blower motor is struggling, energy bills are up, and the house still smells stale because the real issue was a leaky return duct the whole time.
What I’ve learned is that sequence matters more than specification. Seal the ducts first. Confirm airflow is balanced. Then evaluate whether a filter upgrade is actually warranted for your specific conditions. In most homes, a properly maintained MERV 11 filter in a sealed, well-ventilated system outperforms a MERV 13 filter in a leaky, undermaintained one.
The other thing I’d push back on is the idea that air quality is a project you complete. It isn’t. Filter loading, humidity swings, and duct integrity all change with seasons, occupancy, and the age of your equipment. The homeowners I’ve seen maintain genuinely clean indoor air are the ones who treat it as an ongoing practice, not a one-time fix. A consistent maintenance schedule and a basic air quality monitor will do more for your home over five years than any single equipment upgrade.
— Michael
Upgrade your home’s air quality with Hvac
Implementing the strategies in this guide requires the right equipment, from correctly rated filters and whole-home dehumidifiers to ERVs and smart monitoring systems. Hvac provides access to quality HVAC systems and parts at wholesale pricing, along with detailed product guidance to help you select components that are compatible with your existing setup.

Whether you need replacement filters matched to your system’s MERV capacity, duct sealing materials, or a complete system upgrade to support better ventilation, Hvac’s product and services hub covers the full range of residential HVAC solutions. Browse by system type, component category, or air quality application to find equipment that supports your specific improvement goals without overspending on capacity you don’t need.
FAQ
What MERV rating is best for home air quality?
MERV 11 is the most practical choice for most homes, capturing pet dander, fine dust, and common allergens without creating the static pressure issues associated with MERV 13 in systems not rated for it. Always verify your HVAC manufacturer’s maximum recommended MERV rating before upgrading.
How often should I replace my HVAC air filter?
Homes with pets, allergies, or high seasonal pollen should replace filters every 30-60 days. Standard households without these conditions can typically extend replacement to 60-90 days, but filter condition at inspection should always take priority over the stated lifespan on the packaging.
Does sealing air leaks actually improve indoor air quality?
Yes, and it is often more impactful than upgrading filters alone. Leaky ductwork introduces unfiltered air from attics and crawlspaces directly into living areas, bypassing your filter entirely. Sealing ducts and building envelope gaps eliminates this pollutant pathway at the source.
What indoor humidity level prevents mold growth?
Maintaining indoor relative humidity between 30% and 50% prevents mold growth in ducts, on coils, and in wall cavities. Humidity above 50% accelerates biological growth in HVAC components, while levels below 30% create respiratory irritation and increase airborne virus transmission.
When should I add a portable air purifier to my HVAC setup?
A portable air purifier is most useful in rooms with specific air quality concerns, such as a bedroom for an allergy sufferer or a home office with limited duct coverage. Size the unit to achieve 4-5 air changes per hour for the room volume, and select only certified True HEPA models for reliable particle capture.